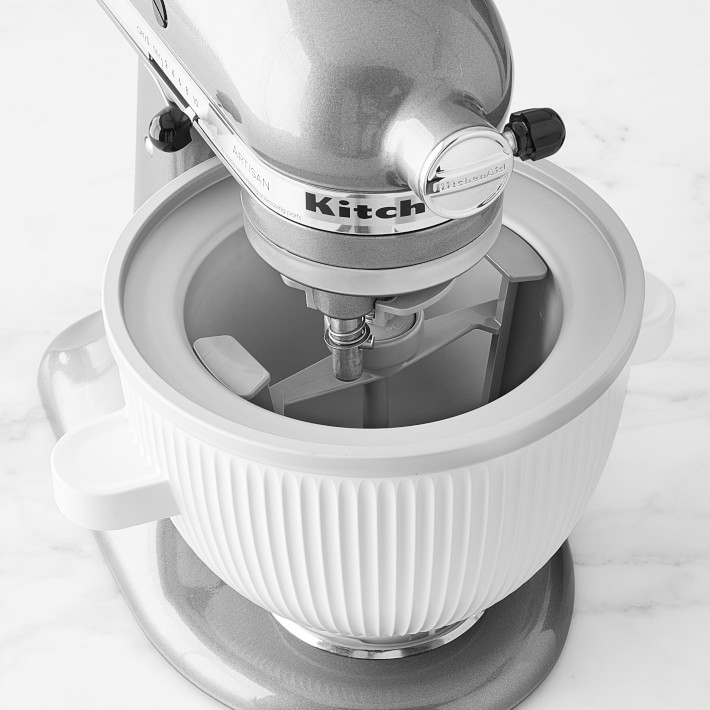
Secure frozen bowl, insert dasher, and lock the KitchenAid ice cream maker into the mixer hub.
I have worked with KitchenAid mixers and attachments for years. I will walk you through how to attach kitchenaid ice cream maker step by step. This guide explains tools, timing, and common mistakes. Read on to make smooth ice cream fast and stress-free.
Why you should learn how to attach kitchenaid ice cream maker correctly
Getting the attachment on right saves you time and keeps the motor and parts safe. A bad fit can mute churning or damage the drive. I have fixed wobbling freeze bowls and rebuilt loose hubs after bad installs. Learning how to attach kitchenaid ice cream maker properly prevents those problems and keeps your ice cream smooth.
What you need before you start
Gather these items and prep them ahead.
- Stand mixer with power hub or open hub cover.
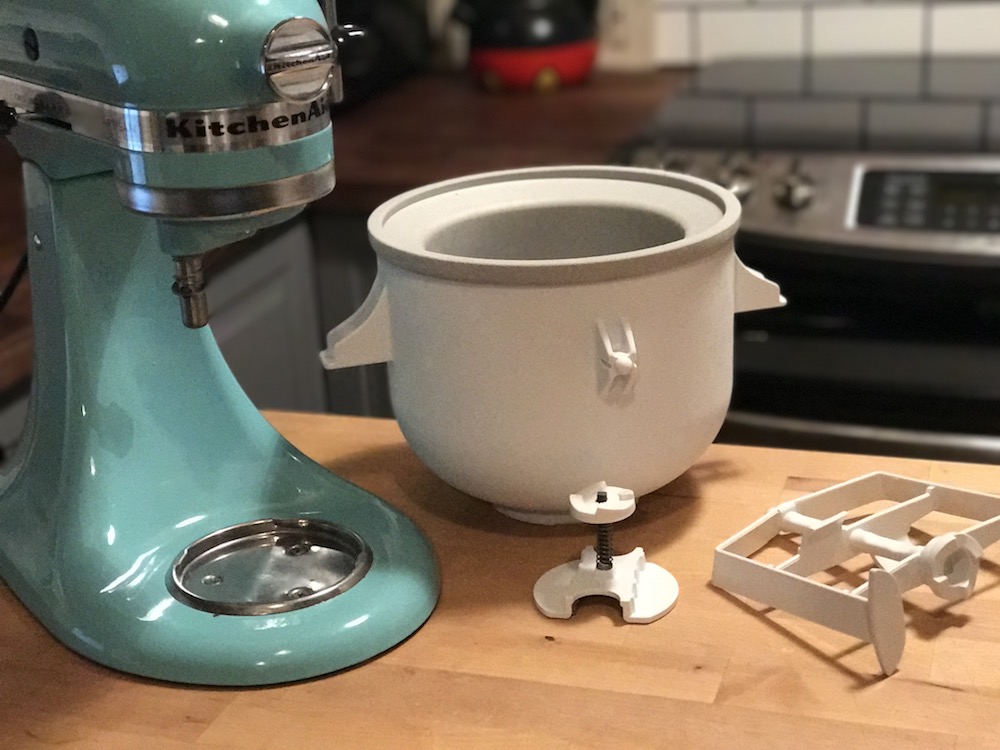
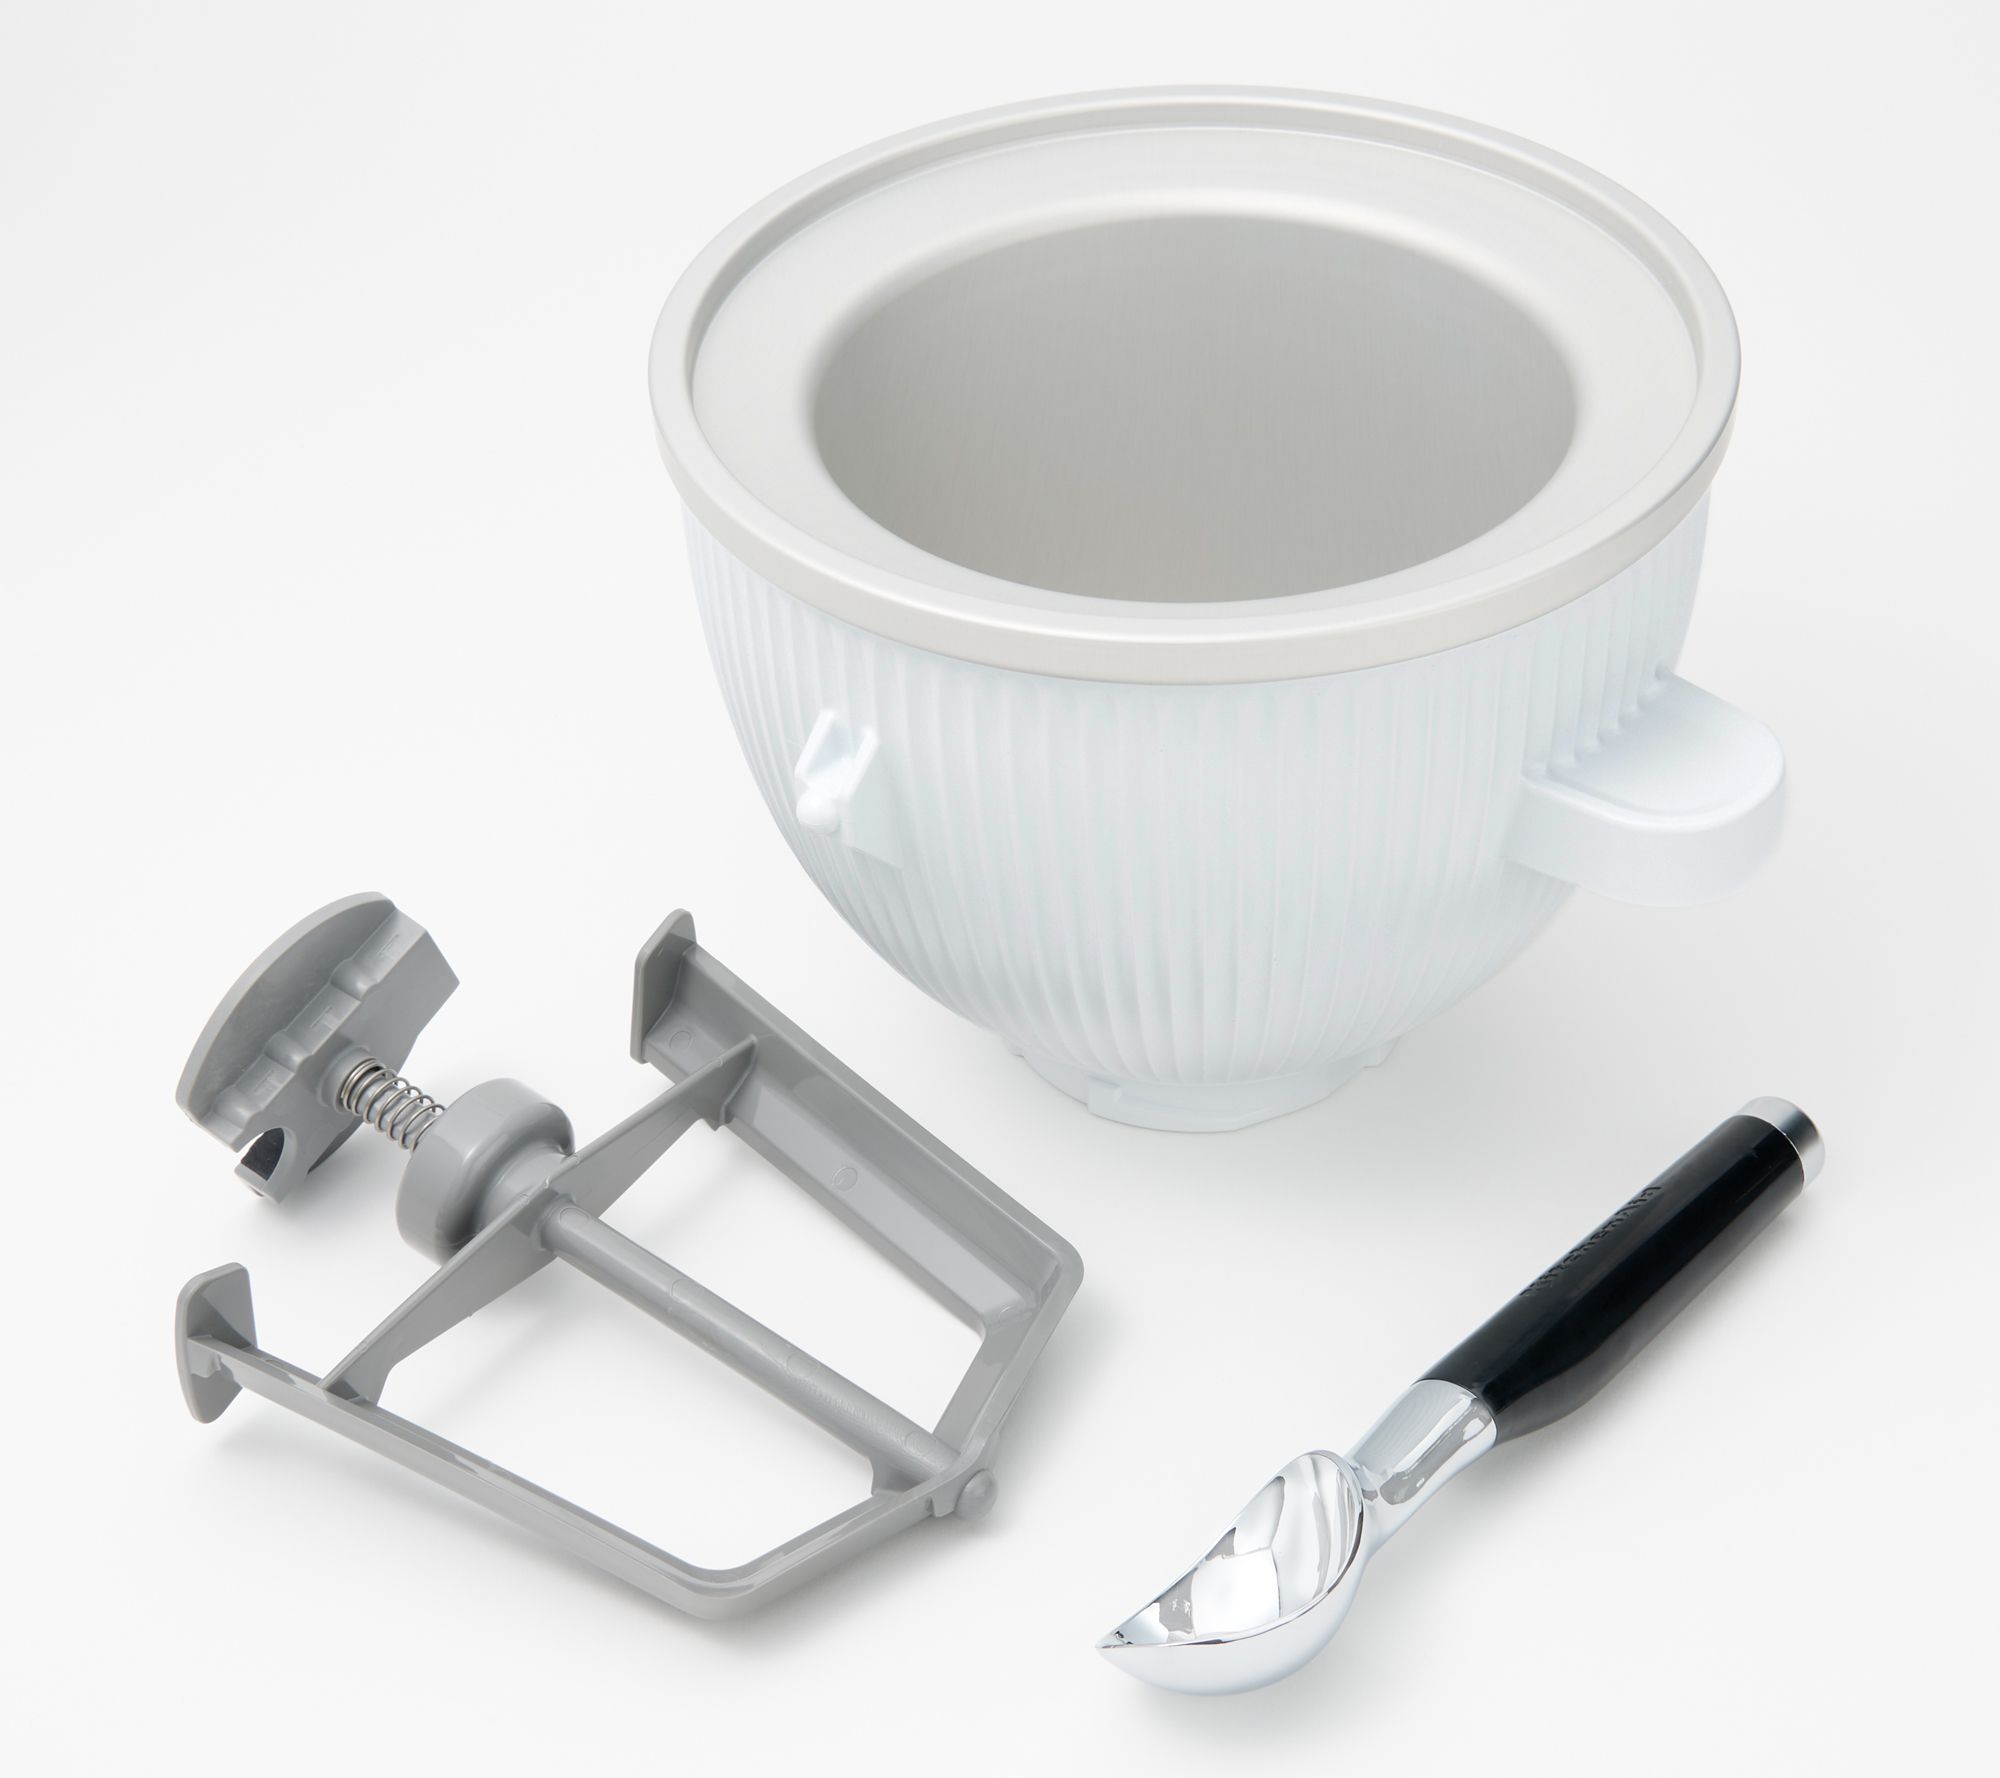
- KitchenAid ice cream maker attachment, frozen bowl, and dasher.
- Ice cream mix chilled and ready to pour.
- Towel and spatula for cleanup.
Freeze the bowl at least 15 to 24 hours. I learned to freeze a second bowl as backup. That tip helps when you want a second batch quickly.
Step-by-step: how to attach kitchenaid ice cream maker
Follow these clear steps. Keep sentences short. Stop and check fit at each step.
- Turn off and unplug the mixer. This is safe and easy to forget.
- Remove the hub cover on the front of the mixer. Turn the clamp screw counterclockwise if your model has one.
- Insert the ice cream maker’s drive shaft into the mixer power hub. Push it straight in until it seats fully.
- Tighten the hub clamp screw or close the hub cover to lock the attachment. The attachment should not wiggle.
- Put the frozen bowl into the mixer. For bowl-lift mixers, lock the bowl under the lift. For tilt-head mixers, lower the head gently.
- Slide the dasher into the center of the frozen bowl. The dasher must line up with the drive shaft.
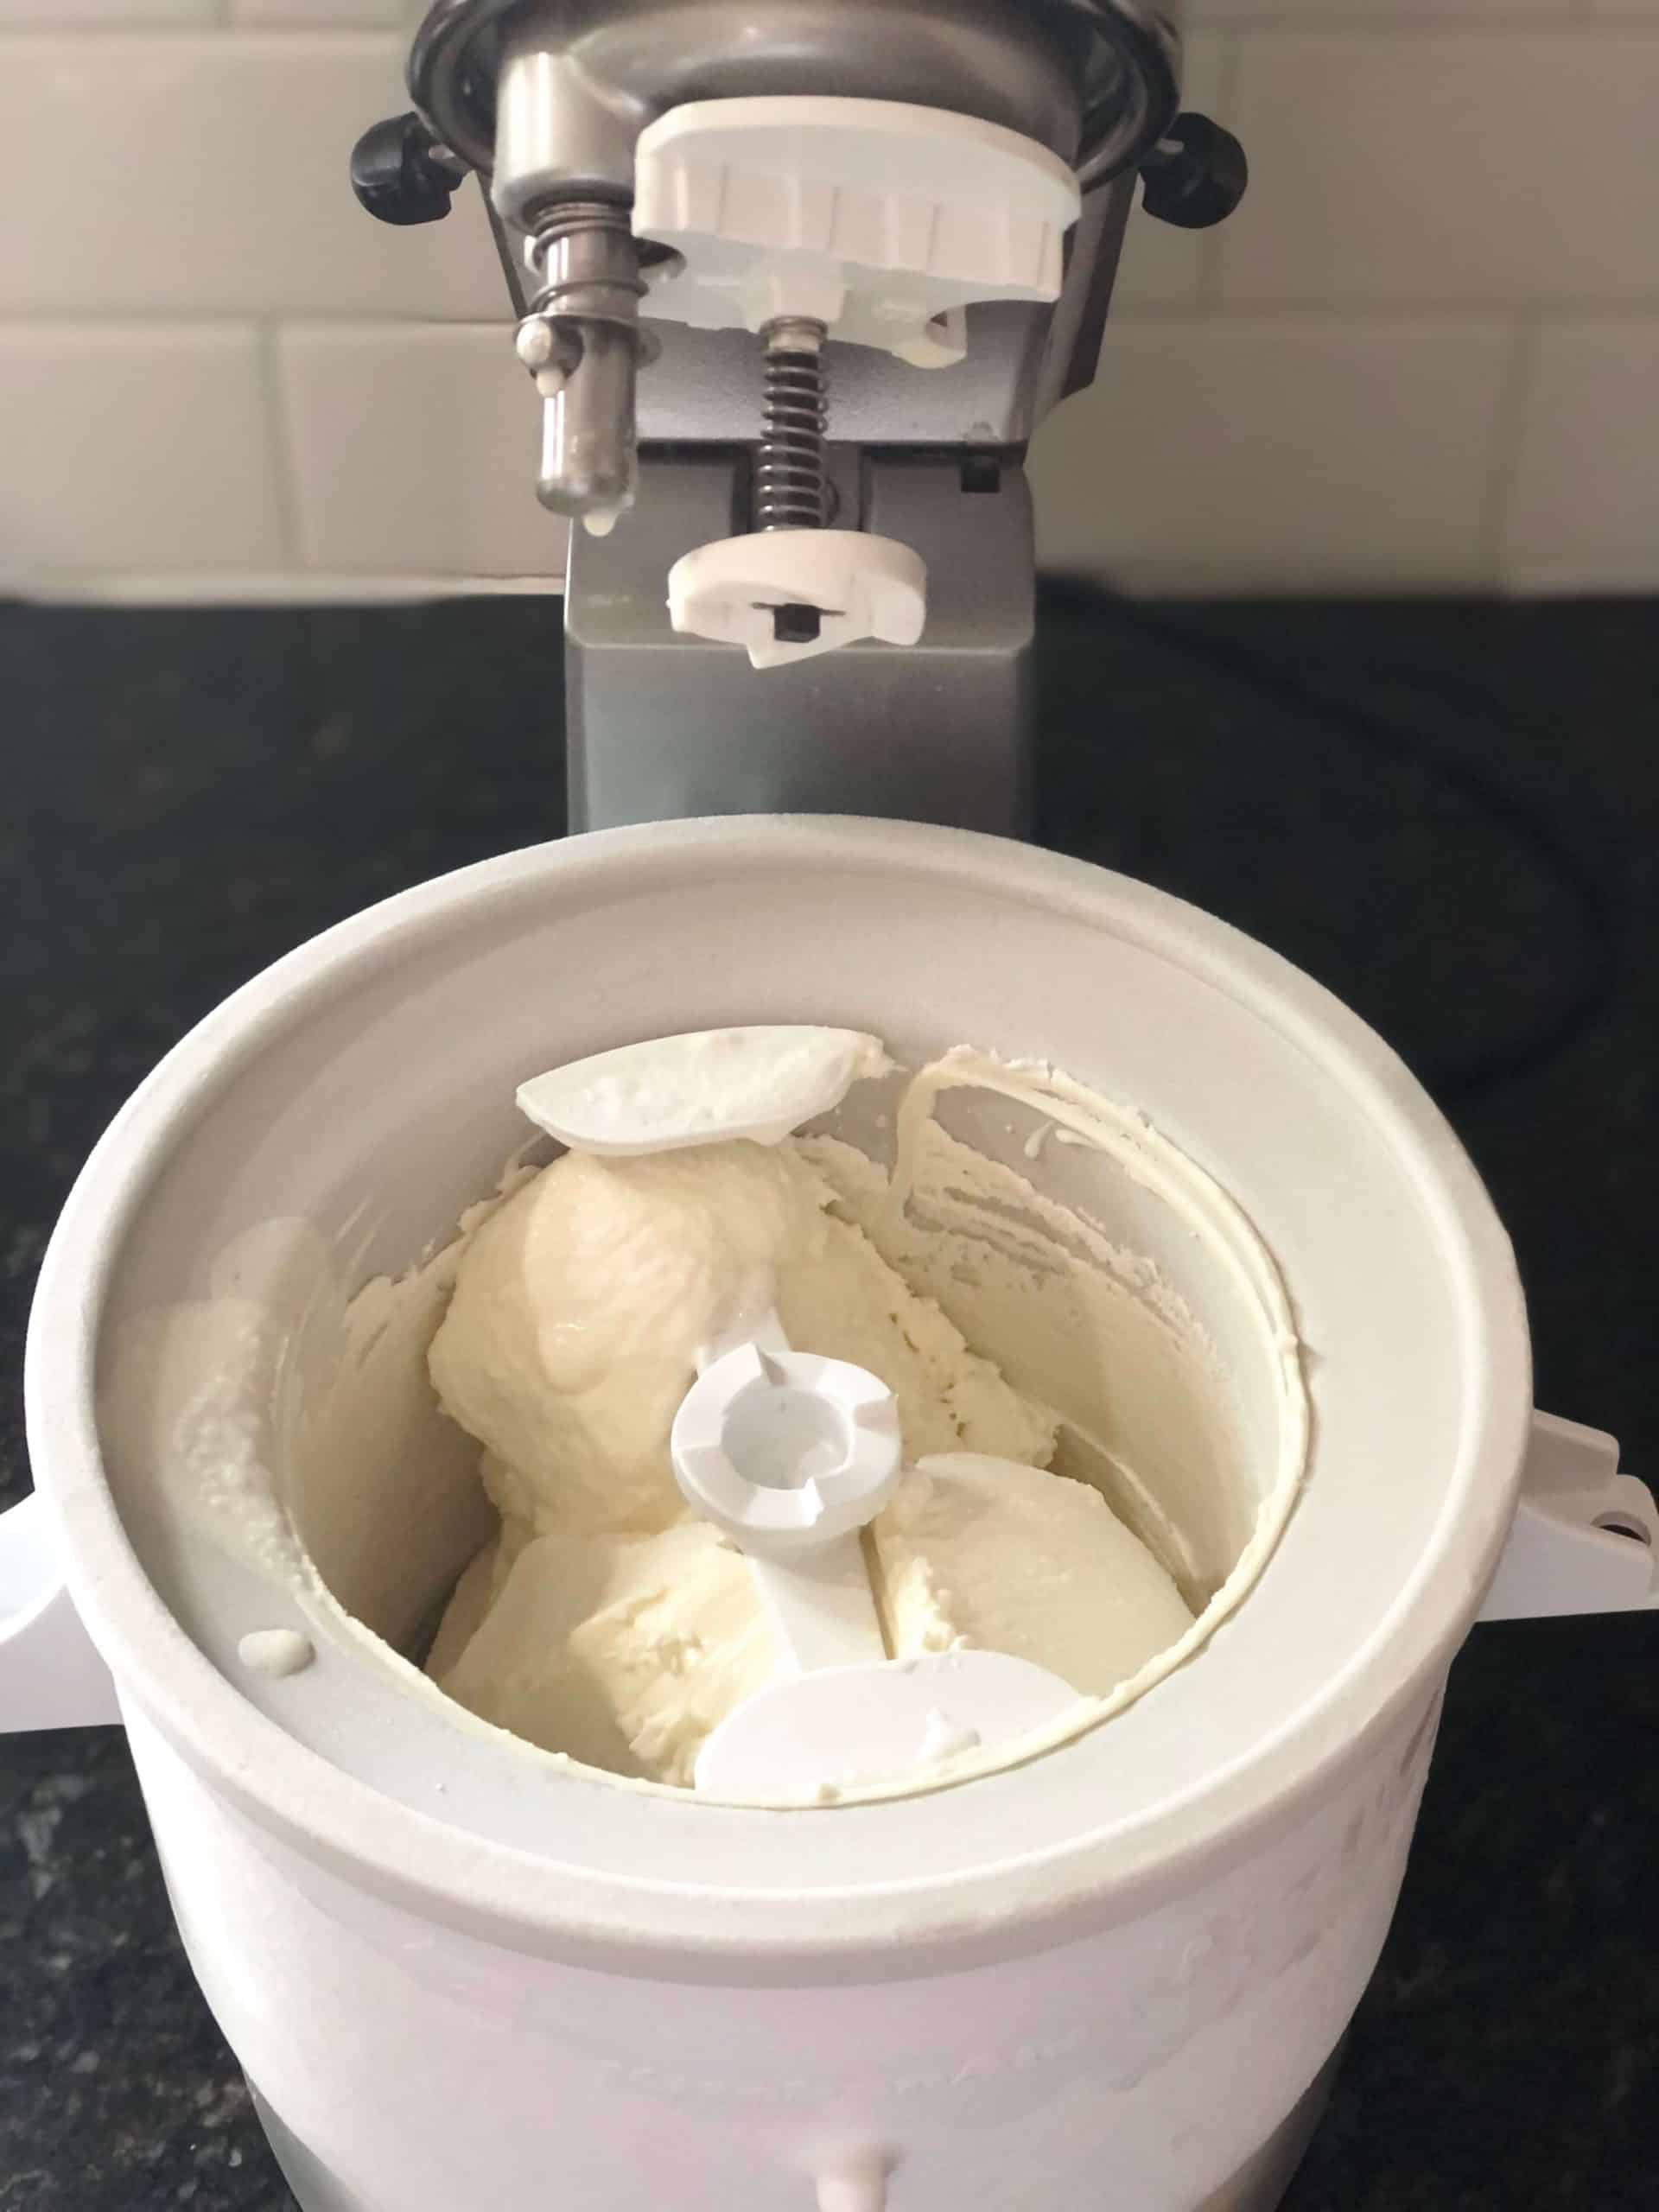
- Lower the mixer head or lock the bowl and test on low speed for 10 seconds. Look for smooth rotation and no rubbing.
- Pour the chilled ice cream mix slowly into the bowl while the dasher turns. Do not overfill the bowl.
I once started churning without tightening the hub. The dasher slipped and the bowl scratched. A quick check after step 4 saved me more than once. These steps show how to attach kitchenaid ice cream maker without stress.

Tips, troubleshooting, and common mistakes when you attach kitchenaid ice cream maker
Short tips you will use again and again.
-
Bowl not turning properly
- Check that the drive shaft is fully inserted and the hub is tightened.
- Confirm the frozen bowl is fully seated and not too warm.
-
Dasher rubbing or scraping
- Make sure the dasher sits centered on the drive coupling.
- Re-seat the bowl and try again at low speed.
-
Ice cream too soft or runny
- The freezer bowl needs 15–24 hours of freezing time.
- Chill your mix well before pouring.
-
Attachment hard to insert
- Wipe the hub and shaft dry. Small ice chips or moisture can block a snug fit.
- Never force the shaft; align and push gently.
-
Noise or vibration
- Stop and inspect. Loose clamp or misaligned dasher are usual causes.
- Replace worn parts if noise persists.
These are the fixes I use most. When I teach friends, they try the quick checks first. They work almost every time.

Care, cleaning, and storage after you attach kitchenaid ice cream maker
Clean parts quickly after use. The ice cream mix hardens fast.
- Remove the attachment from the hub. Unplug the mixer first.
- Wash the dasher and drive parts by hand in warm, soapy water. Do not soak the metal drive shaft for long.
- Rinse and dry thoroughly. Store the frozen bowl dry and upright.
- Keep the attachment in a dry place. Do not leave dried mix on gears.
I store the attachment in the mixer box. It helps me find parts fast. Proper cleaning and storage extend the life of your gear and make the next batch easier.
Frequently Asked Questions of how to attach kitchenaid ice cream maker
How long should I freeze the bowl before use?
Freeze the bowl at least 15 hours, and 24 hours is better for thick results. Short freezes give runny ice cream and longer churning time.
Can I use the ice cream maker on any KitchenAid mixer?
Most KitchenAid stand mixers with a power hub accept the attachment. Check your model manual if you have an older or compact unit.
What speed should I use to churn ice cream?
Use low to medium speed to start, then keep it low for most of the churning. High speed can overwork the motor and add heat.
My dasher scrapes the bowl. What do I do?
Stop the machine and re-seat the dasher and bowl. Make sure the drive shaft is fully seated and the bowl is locked in place.
Do I need to pre-chill the ice cream mix?
Yes. Chill the mix in the fridge before pouring. Cold mix freezes faster and makes smoother ice cream.
Will the attachment damage my mixer?
Not if you attach it correctly and follow the load limits. The motor is designed for light churning; avoid overfilling and hot mixes.
Can I make sorbet or frozen yogurt with the attachment?
Yes. Use chilled fruit purée for sorbet and chilled yogurt blends for frozen yogurt. The process for how to attach kitchenaid ice cream maker is the same.
Conclusion
You can make great ice cream at home once you learn how to attach kitchenaid ice cream maker correctly. Gather the right parts, freeze the bowl well, insert the drive straight, and lock the hub. Check for smooth rotation before you pour in the mix. Try a test batch and adjust speed and chill time to taste. If you liked this guide, try a new flavor and share your result or leave a comment.