
A food processor is a kitchen powerhouse, simplifying countless cooking tasks. This guide reveals the best ways to use your food processor for everything from chopping vegetables to shredding cheese and making smooth purees. You’ll learn essential techniques, safety tips, and maintenance advice to maximize its utility and save time in the kitchen, transforming the way you prepare meals.
Are you ready to unlock the true potential of your kitchen’s unsung hero? Your food processor isn’t just for chopping onions (though it does that beautifully!). It’s a versatile, time-saving powerhouse that can transform the way you cook. From speeding up tedious prep work to creating gourmet dishes with ease, learning the best ways to use a food processor can truly revolutionize your culinary adventures.
This comprehensive guide will walk you through everything you need to know. We’ll cover fundamental setup, various essential techniques, practical tips, and even how to keep your food processor in top shape. Get ready to chop, slice, shred, puree, and much more, all with the incredible efficiency that only a food processor can offer!
Key Takeaways
- Embrace Versatility: Your food processor is capable of much more than just chopping. Explore its potential for slicing, shredding, pureeing, grinding, and even dough making to revolutionize your meal prep.
- Master Blade Selection: Always choose the correct blade or disc for the task at hand. The S-blade is for chopping and pureeing, while specific discs are used for slicing and shredding.
- Utilize the Pulse Function: The pulse button is your best friend for precise control. Use short bursts to achieve desired textures, preventing over-processing and ensuring consistent results.
- Prepare Ingredients Properly: For optimal results, cut ingredients into uniform pieces that fit easily through the feed tube or into the bowl. This promotes even processing and prevents the motor from straining.
- Prioritize Safety: Always ensure the lid is properly locked before operating. Never put your hands near moving blades and always unplug the food processor before assembling, disassembling, or cleaning.
- Clean Promptly for Longevity: Disassemble and wash parts immediately after use. This prevents food from drying onto components, making cleaning easier and maintaining the hygiene and efficiency of your food processor.
Getting Started: Understanding Your Food Processor
Before diving into exciting recipes, let’s make sure you’re comfortable with the basics of your food processor. Knowing its parts and how to assemble it correctly is the first step to safe and effective use.
Familiarize Yourself with Parts
Most food processors share common components, regardless of brand or size. You’ll typically find:
- Motor Base: This is the heavy bottom part that houses the motor. It provides stability and power.
- Work Bowl: The transparent bowl that locks onto the motor base. This is where your ingredients go.
- Lid: This fits securely on top of the work bowl and often has a feed tube. The lid needs to be locked in place for the food processor to operate, a key safety feature.
- Feed Tube and Pusher: The opening in the lid through which you add ingredients. The pusher helps guide food down to the blades without using your hands.
- Blades and Discs: These are the magic makers!
- S-blade (or Chopping Blade): This is the most common blade, shaped like an “S.” It’s used for chopping, mincing, pureeing, and mixing.
- Slicing Disc: A flat disc with a single blade for uniform slices of vegetables or fruits.
- Shredding Disc: A disc with multiple holes for grating cheese, shredding cabbage, or preparing vegetables.
- Other Specialized Discs: Some models come with discs for julienning, French frying, or even kneading dough.
Proper Assembly
Assembling your food processor correctly is crucial for both safety and performance. While models vary, the general steps are similar:
- Place the Motor Base: Set the motor base on a flat, stable surface.
- Attach the Work Bowl: Carefully place the work bowl onto the motor base, usually with a twisting motion until it locks securely in place.
- Insert the Blade/Disc: If you’re using the S-blade, carefully place it over the spindle in the center of the work bowl. If using a disc, place the disc adapter (if your model has one) onto the spindle first, then place the disc on top. Remember, blades are sharp!
- Secure the Lid: Place the lid onto the work bowl, aligning it properly and twisting until it locks. Most food processors have safety interlocks that prevent them from operating if the lid isn’t correctly locked. If you need a more detailed guide, check out how to assemble a food processor step by step.
Safety First
Food processors are powerful tools. Always keep these safety tips in mind:
- Read Your Manual: Every food processor is a little different. Your manual will have specific safety instructions.
- Keep Hands Clear: Never reach into the work bowl when the food processor is plugged in, even if it’s off.
- Use the Pusher: Always use the feed tube and pusher for adding ingredients while the machine is running, especially when slicing or shredding.
- Unplug Before Handling Blades: Always unplug the food processor before assembling, disassembling, cleaning, or changing blades.
- Avoid Overfilling: Don’t fill the work bowl above the maximum fill line. Overfilling can strain the motor and lead to uneven processing or spills.
Mastering the Basics: Chopping and Mincing
Chopping and mincing are arguably the most common tasks for a food processor. It saves incredible amounts of time compared to doing it by hand, especially for larger quantities.
Visual guide about Best Ways to Use Food Processor
Image source: myfoodstory.com
Chopping Vegetables
From onions to carrots, peppers to celery, your food processor can chop them all with remarkable speed.
- Prepare Ingredients: Cut vegetables into roughly 1-inch pieces. This helps them process more evenly. Harder vegetables might need slightly smaller pieces.
- Load the Bowl: Place the S-blade in the work bowl. Add your prepared vegetables. Don’t overfill; process in batches if necessary.
- Use the Pulse Function: This is key! Instead of holding down the “on” button, use short, quick pulses. This gives you control over the texture. Pulse 3-5 times, check the consistency, then pulse again until you reach your desired chop. You can find more detailed instructions on how to chop vegetables with a food processor for perfect results.
- Scrape Down Sides (if needed): If some pieces stick to the sides, turn off the machine, remove the lid, and scrape them down with a spatula before continuing.
Tip: For a finer chop, process for slightly longer, but be careful not to turn vegetables into a puree unless that’s your goal.
Mincing Herbs and Garlic
Mincing fresh herbs and garlic can be tedious by hand. Your food processor makes it a breeze.
- Wash and Dry Herbs: Ensure herbs are clean and thoroughly dry. Excess moisture can make them clump.
- Add to Bowl: Place the S-blade in the work bowl. Add herbs or peeled garlic cloves. For smaller quantities, you might need to use a mini food processor bowl if your model has one, or ensure there’s enough volume for the blade to catch the ingredients.
- Pulse to Mince: Use rapid pulses until the herbs or garlic are finely minced. Again, keep an eye on the consistency to avoid over-processing.
Example: Minced parsley for garnish, garlic for sauces, or ginger for stir-fries.
Efficient Slicing and Shredding
Slicing and shredding tasks are where your food processor truly shines, delivering uniform results in a fraction of the time.

Visual guide about Best Ways to Use Food Processor
Image source: myfoodstory.com
Shredding Cheese
Say goodbye to pre-shredded cheese and hello to fresher, tastier results. Shredding your own cheese is quicker than you think and tastes so much better.
- Chill the Cheese: For best results, ensure your block of cheese is firm and cold from the refrigerator. This prevents it from gumming up the shredding disc.
- Cut to Size: Cut the cheese into pieces that fit comfortably into your food processor’s feed tube.
- Insert Shredding Disc: Place the shredding disc onto the spindle in your work bowl.
- Process: Turn the food processor on. Feed the cheese pieces through the feed tube, using the pusher to guide them down with gentle, even pressure. Don’t force it. Many people consider this the best way to shred cheese in a food processor due to its efficiency.
Tip: For soft cheeses, you might want to freeze them for 10-15 minutes before shredding to firm them up.
Slicing Vegetables
Uniform slices are perfect for gratins, salads, and vegetable trays.
- Choose Slicing Disc: Select the appropriate slicing disc (thin or thick, depending on your recipe).
- Prepare Vegetables: Trim vegetables (like cucumbers, zucchini, potatoes) to fit the feed tube. For round items like tomatoes, you might want to slice them in half first.
- Process: Turn the food processor on. Feed the vegetables through the feed tube, applying gentle, consistent pressure with the pusher.
Example: Perfectly even potato slices for gratin, cucumber slices for salads, or onion rings.
Shredding Cabbage and Other Produce
Making coleslaw or large batches of shredded vegetables is incredibly fast with your food processor.
- Prep Produce: For cabbage, quarter or wedge it so it fits into the feed tube. For carrots or zucchini, cut them into manageable lengths.
- Insert Shredding Disc: Use the coarse or fine shredding disc as desired.
- Process: Turn the food processor on and feed the produce through the feed tube, using the pusher. You’ll be amazed at how quickly an entire head of cabbage can be shredded for coleslaw! Learning how to use your food processor to shred cabbage can save you a lot of time.
Example: Shredded carrots for salads, potatoes for hash browns, or a large batch of cabbage for fermented foods.
Crafting Purees, Sauces, and Dips
The S-blade is your best friend for creating smooth, creamy textures for everything from baby food to sophisticated sauces.
Smooth Purees
Achieving silky-smooth purees is effortless with a food processor.
- Cook Ingredients (if necessary): Many purees start with cooked ingredients (e.g., steamed carrots, roasted sweet potatoes). Allow them to cool slightly.
- Load and Process: Place the S-blade in the work bowl. Add your ingredients. For very smooth purees, you might want to add a little liquid (water, broth, milk, oil) to help it along.
- Process Until Smooth: Use the “on” setting and let the food processor run continuously, scraping down the sides as needed, until the desired smooth consistency is reached.
Example: Homemade baby food, creamy vegetable soups, or smooth fruit purees for desserts.
Delicious Sauces and Pestos
Whip up fresh pesto, hummus, or creamy dressings in minutes.
- Assemble Ingredients: For pesto, this means basil, pine nuts, garlic, Parmesan, and olive oil. For hummus, chickpeas, tahini, lemon juice, garlic, and water.
- Add Solids First: Place the S-blade in the work bowl. Add solid ingredients (nuts, garlic, herbs, chickpeas) and pulse to chop them down.
- Drizzle in Liquid: With the food processor running (or pulsing), slowly drizzle in your liquid ingredient (like olive oil for pesto or water for hummus) through the feed tube until the desired consistency is achieved.
Example: Classic basil pesto, sun-dried tomato pesto, or a rich roasted red pepper sauce.
Creamy Dips and Spreads
From bean dips to creamy spreads, your food processor makes them easy.
Simply combine your ingredients with the S-blade and process until smooth and well-combined. You can adjust the consistency by adding more liquid or solid ingredients as you go.
Example: Creamy spinach dip, black bean dip, or a smooth paté.
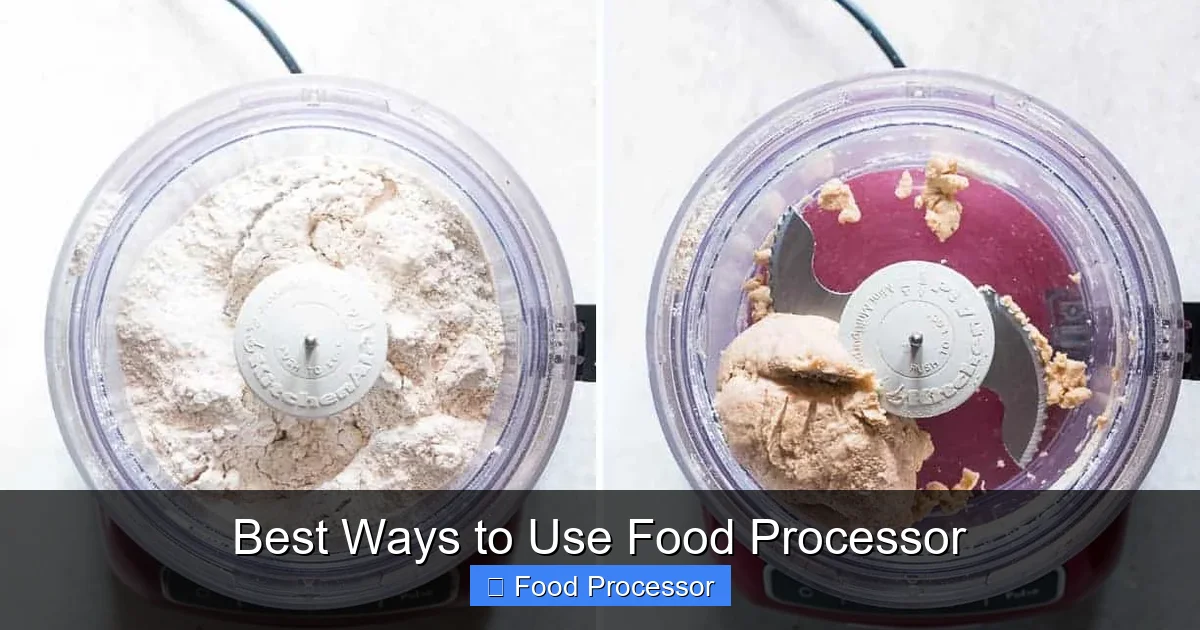
Dough Making Made Easy
Yes, your food processor can even handle certain types of dough, especially those that benefit from minimal handling.
Pie Crusts and Pastry Dough
Making flaky pie crusts is a snap with a food processor, as it prevents overworking the gluten.
- Add Dry Ingredients: Place the S-blade in the work bowl. Add flour, salt, and any other dry ingredients. Pulse once or twice to combine.
- Add Cold Fat: Add very cold, cubed butter or shortening. Pulse in short bursts until the mixture resembles coarse crumbs with some pea-sized pieces of fat remaining.
- Add Ice Water: With the food processor running, slowly drizzle in ice-cold water through the feed tube, just until the dough comes together. Stop immediately. Do not over-process.
- Form and Chill: Remove the dough, form it into a disc, wrap, and chill before rolling out.
Tip: The key to flaky pastry is cold fat and minimal processing to avoid developing too much gluten.
Bread and Pizza Dough
Some food processors come with a dedicated dough blade, but the S-blade can also work for quick yeast doughs or pizza doughs.
- Activate Yeast (if needed): If your recipe calls for it, activate yeast in warm water/milk.
- Combine Dry Ingredients: Place the S-blade in the work bowl. Add flour, salt, and sugar. Pulse to combine.
- Add Wet Ingredients: With the food processor running, slowly pour in the liquid (including yeast mixture) through the feed tube until a dough ball forms. Continue to process for 30-60 seconds to knead the dough.
- Finish by Hand: For best results, finish kneading by hand for a minute or two on a floured surface, then allow to rise as per your recipe.
Note: While convenient, a stand mixer is generally preferred for kneading larger, stiffer doughs for extended periods.
Grinding Nuts, Seeds, and More
Transform whole ingredients into flours, butters, or coarse crumbs with ease.
Making Nut Butters and Flours
Homemade nut butter is healthier and often more delicious than store-bought versions.
- Roast Nuts (Optional): Roasting nuts beforehand can enhance flavor and release oils, making processing easier.
- Process: Place the S-blade in the work bowl. Add nuts. Process continuously. This will go through several stages: chopped, then coarse meal, then a sticky ball, and finally a smooth, creamy butter. You’ll need to stop occasionally to scrape down the sides. This process can take 5-10 minutes, depending on your food processor and the type of nut.
Example: Peanut butter, almond butter, cashew butter, or almond flour from whole almonds.
Grinding Spices and Coffee Beans
Freshly ground spices and coffee can elevate your dishes and drinks.
- Small Batches: For best results, grind small quantities at a time to ensure evenness and prevent overheating.
- Process with S-blade: Use the S-blade and pulse until desired fineness is achieved.
Caution: Be aware that grinding very hard spices like whole nutmeg can be tough on some food processor motors and blades. Also, if you regularly use a food processor to grind coffee, be aware it may not achieve the uniform grind of a dedicated coffee grinder and can leave a faint coffee aroma in your bowl.
Example: Grinding whole cumin seeds, making breadcrumbs from stale bread, or creating graham cracker crumbs for pie crusts.
Emulsifying and Blending
Achieve stable emulsions like mayonnaise or perfectly blended dressings.
Homemade Mayonnaise
Making your own mayonnaise means fresh, flavorful results without preservatives.
- Combine Base Ingredients: Place egg yolk, mustard, vinegar, and salt in the work bowl with the S-blade. Process until combined.
- Slowly Drizzle Oil: With the food processor running, very slowly drizzle in a neutral oil (like canola or grapeseed) through the feed tube. The key is to add the oil in a thin, steady stream. If you add it too quickly, the emulsion might break.
- Process Until Thick: Continue processing until the mixture is thick and emulsified.
Salad Dressings
Whip up creamy or vinaigrette-style dressings in moments.
Combine all dressing ingredients in the work bowl with the S-blade and process until thoroughly blended and emulsified. This works especially well for creamy dressings or those that contain herbs, shallots, or garlic.
Cleaning and Maintenance for Longevity
Keeping your food processor clean isn’t just about hygiene; it’s about maintaining its performance and extending its lifespan.
Immediate Cleanup
The best time to clean your food processor is immediately after use.
- Unplug: Always unplug the unit before cleaning.
- Disassemble: Remove the lid, pusher, blade/disc, and work bowl.
- Rinse: Rinse all removable parts under warm running water to remove most food particles.
Deep Cleaning
For a thorough clean:
- Wash with Soap: Wash the work bowl, lid, pusher, and blades/discs with warm, soapy water. Use a brush for hard-to-reach areas. Be extra careful with blades; they are very sharp.
- Dishwasher Safe? Many food processor parts are top-rack dishwasher safe, but always check your manual first.
- Wipe Base: Wipe the motor base with a damp cloth. Never immerse the motor base in water.
- Dry Thoroughly: Ensure all parts are completely dry before reassembling or storing to prevent mildew or odors.
Blade Care
Blades can dull over time. Avoid putting them in the dishwasher too frequently, as harsh detergents can accelerate dulling. Store them safely to prevent accidental cuts and protect the sharp edges.
Advanced Tips for Optimal Food Processor Use
Become a food processor pro with these extra tips and tricks!
Don’t Overfill
Always respect the “max fill” line on your work bowl. Overfilling can strain the motor, lead to spills, and result in unevenly processed food. It’s always better to process in smaller batches.
Use the Pulse Function Liberally
As mentioned before, the pulse function is your best friend. It gives you precise control over texture, especially for chopping and grinding. A few short pulses are often better than one long run.
Evenly Sized Pieces
When chopping or slicing, cut your ingredients into roughly uniform sizes that fit the feed tube. This ensures that all pieces process at the same rate, giving you consistent results.
Chill for Better Shredding and Slicing
For softer items like cheese, cooked meats, or even certain vegetables (like bell peppers), chilling them in the freezer for 10-15 minutes before processing can make them firmer and easier to shred or slice cleanly, preventing mushiness.
Scrape Down Sides
For tasks like pureeing or making nut butter, ingredients can stick to the sides of the work bowl. Periodically stop the food processor, remove the lid, and use a rubber spatula to scrape the sides down. This ensures all ingredients are incorporated and processed evenly.
Troubleshooting Common Food Processor Issues
Even with the best practices, you might encounter a snag or two. Here’s how to tackle some common issues.
Uneven Processing
If you have some finely chopped pieces and some large chunks, it’s often due to:
- Overfilling: Too much food prevents the blades from circulating properly. Process in smaller batches.
- Uneven Initial Cuts: Make sure your ingredients are cut into roughly similar sizes before adding them to the bowl.
- Not Enough Pulsing: You might be running it too long. Use short, sharp pulses and check the consistency frequently.
Stuck Blade or Motor Stops
This usually happens when the food processor is overloaded or trying to process something too hard.
- Check Capacity: Ensure you’re not exceeding the maximum fill line.
- Reduce Load: Remove some ingredients and process in smaller batches.
- Hard Ingredients: For very hard items, you might need to cut them into smaller pieces or use a different tool. Don’t force your food processor.
- Overheat Protection: Many food processors have a thermal cut-off switch. If it stops, unplug it and let it cool down for 30 minutes to an hour before trying again.
Liquid Leaks
If liquid is seeping out from under the work bowl or lid:
- Check Assembly: Ensure the work bowl and lid are properly locked into place. An improper seal will cause leaks.
- Max Fill Line: You might be exceeding the maximum liquid fill line. Reduce the amount of liquid.
- Damaged Seal: Inspect the rubber seal on your blade assembly or lid. If it’s cracked or worn, it might need to be replaced.
Conclusion
Your food processor is an invaluable kitchen tool, a true workhorse capable of simplifying countless cooking tasks. By understanding its functions, mastering essential techniques like pulsing, and keeping safety and maintenance in mind, you can transform your meal preparation. From quickly chopping vegetables and shredding cheese to crafting homemade sauces and even kneading dough, the possibilities are vast. Embrace the power and versatility of your food processor, and you’ll find yourself saving time, reducing effort, and enjoying more delicious, homemade meals than ever before. Happy processing!