
Yes, you absolutely can grind meat using a food processor, transforming cuts into fresh, customized ground meat for your favorite recipes. The key to success lies in proper meat preparation—chiefly chilling it thoroughly—and employing a rapid pulsing technique to achieve an even texture without over-processing. With the right approach, your food processor becomes a versatile tool for homemade burgers, meatballs, and more.
Can Food Processor Grind Meat?
Ever wondered if your trusty food processor can handle the job of grinding meat? The short answer is a resounding yes! While a dedicated meat grinder is certainly built for the task, your food processor is surprisingly capable of transforming cuts of meat into fresh, homemade ground meat. This opens up a world of possibilities, from custom burger blends to flavorful meatballs and sausages, all with ingredients you trust.
In this comprehensive guide, we’ll walk you through everything you need to know about how to grind meat with a food processor. We’ll cover essential preparation steps, a clear, step-by-step process, practical tips for achieving the best results, and common pitfalls to avoid. By the end, you’ll be a pro at using your food processor to grind meat, adding a new skill to your culinary repertoire.
Key Takeaways
- Chill Your Meat Thoroughly: Always freeze your meat for 15-30 minutes before grinding. This firms it up, allowing the food processor blades to cut cleanly rather than smearing.
- Cut Meat into Small, Even Cubes: Trim away excess fat, gristle, and silver skin, then cut the meat into 1-inch pieces. Smaller, uniform pieces process more evenly.
- Work in Small Batches: Overloading the food processor bowl will lead to uneven grinding and potentially overheat the motor. Process only about 1/2 to 1 pound of meat at a time.
- Use the “Pulse” Setting: Avoid continuous running. Instead, use short, rapid pulses. This gives you greater control over the texture and prevents the meat from turning into a paste.
- Desired Consistency Dictates Processing Time: For a coarse grind, fewer pulses are needed. For a finer grind, continue pulsing in short bursts, checking the consistency frequently.
- Clean Your Food Processor Immediately: Meat residue can be tough to clean once dried. Disassemble and wash all parts promptly after use to ensure hygiene and ease of cleaning.
- Not All Food Processors Are Equal: While most can handle the task, powerful food processors with sharp S-blades will yield the best and most consistent results for grinding meat.
Why Grind Your Own Meat?
There are several compelling reasons to take control of your ground meat supply:
- Freshness: You know exactly when the meat was processed, ensuring peak freshness.
- Quality Control: Choose specific cuts of meat and control the fat content. No mystery meat here!
- Custom Blends: Want a unique burger blend of sirloin and brisket? Or maybe lean turkey with a bit of pork for moisture? Grinding your own lets you experiment.
- Cost-Effective: Often, whole cuts of meat are cheaper per pound than pre-ground varieties.
- Better Texture and Flavor: Freshly ground meat often has a superior texture and richer flavor compared to store-bought options that might be ground days in advance.
Is Your Food Processor Up to the Task?
Before you dive in, let’s make sure your food processor is ready. Most standard food processors with an S-shaped blade (also known as a sabatier blade or universal blade) can handle grinding meat. However, there are a few things to consider:
Power Matters
A more powerful motor will make the job quicker and more efficient, reducing the risk of overheating and producing a more consistent grind. If you’re wondering if a food processor can truly stand in for a traditional grinder, you might find our article on can a food processor be used as a meat grinder insightful. While it won’t be identical, it’s very effective for most home cooking needs.
Sharp Blades are Essential
Dull blades will struggle to cut the meat cleanly, leading to a mushy texture rather than a distinct grind. Ensure your S-blade is sharp.
Bowl Size
You’ll be working in batches, so the bowl size isn’t a deal-breaker, but a larger capacity means fewer batches. A standard 8-12 cup food processor is ideal for most home kitchens. When considering a new appliance, thinking about what to consider when buying a food processor can guide your choice, especially if you plan on grinding meat regularly.
Preparation is Key: Chilling Your Meat
This step is arguably the most crucial for successful meat grinding in a food processor. Cold meat is firm meat, and firm meat cuts cleanly. Warm meat, on the other hand, will smear and turn into a paste.
Choosing the Right Cut of Meat
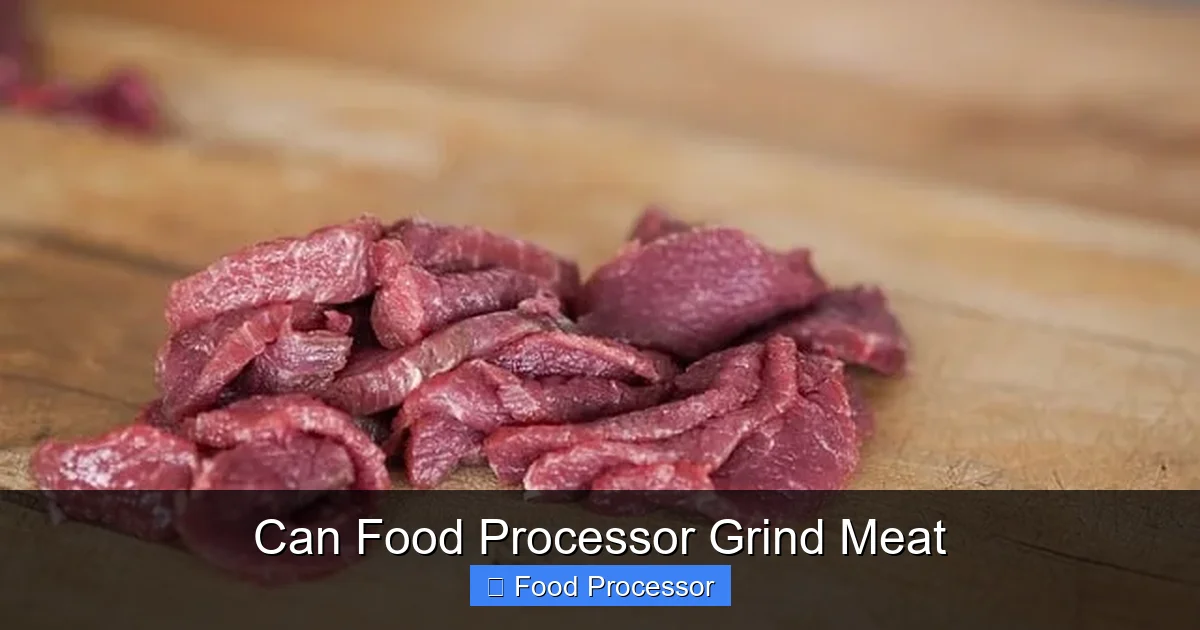
You can grind almost any type of raw meat: beef, pork, chicken, turkey, lamb, or even venison.
- For Beef: Chuck roast is a popular choice for its balance of meat and fat, perfect for burgers. Sirloin or round can be used for leaner grinds.
- For Pork: Pork shoulder (Boston butt) works wonderfully for sausages and ground pork dishes due to its excellent fat content.
- For Poultry: Boneless, skinless chicken or turkey thighs provide more flavor and moisture than breasts. You can use breasts for a very lean grind.
Trimming Fat and Grinding Consistency
While some fat is desirable for flavor and moisture, you’ll want to trim off any excessive, hard fat, gristle, or silver skin. These can get wrapped around the food processor blade, causing it to jam or leading to an uneven grind. If you’re aiming for a lean grind, trim more fat. For a richer flavor (like for burgers), leave a moderate amount of fat (around 15-20%).
Visual guide about Can Food Processor Grind Meat
Image source: smartkitchenimprovement.com

Visual guide about Can Food Processor Grind Meat
Image source: i.ytimg.com
The Importance of Freezing/Chilling
After trimming, cut your meat into 1-inch (2.5 cm) cubes. This size allows the food processor blade to work effectively. Now, here’s the magic trick: spread the meat cubes in a single layer on a baking sheet lined with parchment paper and place them in the freezer for 15-30 minutes. The goal isn’t to freeze them solid, but to get them very cold and firm, almost icy. This firmness is what prevents the meat from turning into an undesirable paste. You should even chill your food processor bowl and blade in the refrigerator during this time for an extra cold environment!
Step-by-Step Guide: How to Grind Meat with a Food Processor
Ready to turn those chunks into ground goodness? Let’s get started!
Step 1: Gather Your Equipment
You’ll need your food processor with the S-blade inserted, your chilled meat cubes, a spatula or spoon, and a large bowl for the finished ground meat. Make sure your food processor parts are clean and dry. If you’re frequently grinding raw meat, you might want to look into the best food processor for raw meat to ensure you have a robust model.
Step 2: Prepare the Meat (Chill and Cut)
As discussed, this is paramount. Ensure your meat is trimmed of excess gristle and silver skin, cut into 1-inch cubes, and has been in the freezer for 15-30 minutes until very firm but not completely solid. Work quickly to keep the meat as cold as possible.
Step 3: Load the Food Processor
Place about 1/2 to 1 pound (225-450 grams) of the chilled meat cubes into the food processor bowl. Do not overload the bowl. Overloading will result in uneven grinding and can strain your food processor’s motor, making the process less efficient and potentially damaging the machine. If you’re unsure how long you can leave a food processor running, it’s always best to err on the side of caution and work in short bursts, especially with tough tasks like grinding meat.
Step 4: The Pulsing Technique
Secure the lid on your food processor. Instead of holding down the “on” button, you’re going to use the “pulse” function. Pulse the meat in short bursts, usually 1-2 seconds at a time. This allows you to control the consistency and prevents the meat from heating up too quickly. The meat will start to break down and move around the bowl.
- Initial Pulses: Start with 5-10 quick pulses. The meat will break into larger chunks.
- Re-distribute: After a few pulses, open the lid (with the machine off!) and use a spatula to push down any meat that has climbed the sides of the bowl or stuck to the lid. This ensures even processing.
- Continue Pulsing: Resume pulsing, checking the consistency every few pulses. You’ll see the meat getting finer and more uniform.
Step 5: Check Consistency
How do you know when it’s done? Stop pulsing and examine the texture. For a coarse grind, you might only need 15-20 pulses in total. For a finer grind, you might need more, but still, proceed cautiously. The ideal texture will resemble store-bought ground meat, with distinct, small granules, not a smooth paste. Be careful not to over-process, as this is when meat turns into an undesirable mush.
Step 6: Repeat with Remaining Meat
Once you’ve achieved the desired consistency for your first batch, transfer the ground meat to your large bowl. Place it in the refrigerator while you process the remaining batches to keep it cold. Repeat Steps 3-5 until all your meat is ground.
Step 7: Cleaning Up
After you’ve finished, promptly disassemble your food processor and wash all parts. Cold water and dish soap are usually sufficient. Many food processor parts are dishwasher safe, but always check your manufacturer’s instructions. For guidance on machine washing, check if you can put food processor parts in the dishwasher. Cleaning immediately prevents meat residue from drying and becoming much harder to remove.
Tips for Best Results
- Don’t Overload: This cannot be stressed enough. Small batches are key to even grinding and protecting your appliance.
- Keep Everything Cold: Meat, bowl, and blade – the colder, the better. This is the secret to a great texture.
- Use the “Pulse” Setting: It gives you control. Continuous running heats the meat and risks creating a paste.
- For Finer Grinds, Process in Batches: If your recipe calls for very fine ground meat, achieve a coarse grind first, then divide that into even smaller batches and pulse again briefly.
- Add Some Fat (if necessary): If you’re using very lean cuts, adding a few small cubes of firm fat (like pork belly or beef suet) to a batch can help with texture and flavor.
- Don’t Forget the Freezer: If your meat warms up between batches, pop it back in the freezer for a few minutes.
Common Mistakes to Avoid
- Over-processing: This is the most common error. Pulsing too long or continuously running the machine will result in a paste-like, undesirable texture.
- Using Warm Meat: As mentioned, warm meat smears. Always ensure your meat is very cold.
- Overloading the Bowl: Leads to uneven grinding, overworked motor, and longer processing times.
- Trying to Grind Bones or Hard Gristle: Your food processor is not designed for this. It can damage the blades and motor. Trim these out meticulously.
- Not Cleaning Promptly: Dried meat residue is a chore to remove and can harbor bacteria.
What Kind of Meat Can You Grind?
Your food processor is surprisingly versatile. You can grind:
- Beef: Chuck, sirloin, round, short rib.
- Pork: Pork shoulder (Boston butt), tenderloin, belly.
- Poultry: Boneless, skinless chicken thighs or breasts, turkey thighs or breasts.
- Lamb: Lamb shoulder.
- Game Meats: Venison, elk (ensure they are trimmed of all sinew and silver skin).
Recipes to Try with Your Freshly Ground Meat
Now that you have beautiful, freshly ground meat, what can you make? The possibilities are endless!
- Gourmet Burgers: Create custom blends with different cuts and fat ratios.
- Homemade Sausages: Control the seasonings and ingredients.
- Meatballs and Meatloaf: Achieve a tender texture with your custom grind.
- Tacos and Chili: Elevate everyday dishes with superior ground meat.
- Shepherd’s Pie or Bolognese Sauce: The freshness will shine through.
Troubleshooting Common Issues
Even with the best intentions, you might run into a snag or two. Here’s how to tackle them:
Meat is Mushy or Pasty
This is almost always due to the meat being too warm or over-processed.
Solution: Ensure your meat is very firm and chilled, almost icy, before grinding. Use shorter, more deliberate pulses. If a batch turns mushy, consider using it for something like pâté or a very fine meat paste, and adjust your technique for the next batch.
Meat is Unevenly Ground (some fine, some chunky)
This happens when the bowl is overloaded or the meat isn’t properly redistributed.
Solution: Work in smaller batches. Stop the processor frequently, open the lid, and scrape down the sides of the bowl with a spatula to ensure all meat gets even contact with the blade. Also, make sure your initial meat cubes are roughly the same size.
Food Processor Overheating
Grinding meat is a strenuous task. If you hear the motor struggling or smell something burning, stop immediately.
Solution: Always work in small batches and use the pulse function, giving the motor short breaks. If it starts to overheat, turn it off and let it cool down for 10-15 minutes before continuing. This is also why understanding the limits, like how long you can leave a food processor running, is helpful.
Meat Gets Stuck Under the Blade
This usually occurs with larger pieces of meat, tough gristle, or if the blade isn’t sharp enough.
Solution: Always ensure meat is cut into 1-inch cubes and trimmed of all tough connective tissue. If it gets stuck, turn off the processor, carefully remove the blade, and clear the obstruction before reassembling and continuing.
Conclusion
Grinding meat in your food processor is a fantastic way to elevate your home cooking, offering unparalleled freshness, control, and flavor. While it requires a bit of patience and a careful approach, especially with the critical chilling and pulsing techniques, the results are incredibly rewarding. You’ll gain a deeper understanding of your ingredients and unlock new culinary possibilities, making your food processor an even more indispensable tool in your kitchen. So go ahead, give it a try – your taste buds (and your budget) will thank you!