
Learning how to food processor garlic is a game-changer for any home cook, saving you time and effort while ensuring consistent results. This comprehensive guide walks you through every step, from selecting and peeling garlic to processing it into your desired consistency and storing it for future use. Get ready to enjoy fresh, perfectly processed garlic without the tedious chopping or lingering smell on your hands!
How to Food Processor Garlic
Garlic is a cornerstone of countless delicious dishes. Its pungent, aromatic flavor enhances everything from pasta sauces to stir-fries, marinades, and dips. But let’s be honest, peeling and mincing garlic can be a chore. It’s sticky, time-consuming, and leaves a lingering smell on your hands. This is where your trusty food processor comes in!
Using a food processor to mince or paste garlic is a culinary superpower. It’s fast, efficient, and delivers consistent results, saving you precious time and effort in the kitchen. Whether you need a fine mince for a delicate sauce or a smooth paste for a robust marinade, your food processor can handle it with ease.
In this comprehensive guide, we’ll walk you through everything you need to know about how to food processor garlic. We’ll cover selecting the best garlic, preparing it perfectly, processing it to your desired consistency, and even storing it for future use. Get ready to transform your cooking experience and make garlic prep a breeze!
Key Takeaways
- Garlic Prep is Key: Always start with fresh, firm garlic cloves and ensure they are thoroughly peeled and trimmed before processing.
- Use the Pulse Function: The pulse setting is your best friend for food processor garlic. It allows for precise control over consistency, preventing over-processing into a watery mush.
- Scrape Down the Bowl: Frequently stop and scrape down the sides of the food processor bowl with a spatula to ensure all garlic is evenly processed.
- Add a Little Liquid (Optional): For a finer paste, a small amount of olive oil can help create a smoother consistency and aid in preservation.
- Store Properly for Freshness: Processed garlic can be stored in an airtight container in the fridge for a few days, or frozen in oil for longer-term convenience.
- Don’t Overload or Underload: Ensure you have enough garlic for the blade to catch effectively, but don’t pack the bowl too full, which can lead to uneven processing.
- Clean Immediately: Garlic’s strong scent can linger. Clean your food processor parts immediately after use to prevent odor absorption.
Before You Start: Gather Your Tools
Before you dive into processing garlic, let’s make sure you have everything ready. Having your tools at hand will make the process smooth and efficient.
What You’ll Need:
- Food Processor: Of course! Any size will generally work, but a smaller one (like a 3-cup mini-chopper) is often ideal for individual batches of garlic. However, a standard 7-cup or 12-cup model works perfectly too, especially if you’re doing a larger batch. Choosing the right size food processor is key for efficiency, especially for tasks like this. For general guidance, you can learn more about how to choose the right size food processor for all your kitchen needs.
- Garlic Cloves: As many as your recipe or meal prep requires.
- Cutting Board and Sharp Knife: For separating cloves and trimming.
- Rubber Spatula: Essential for scraping down the sides of the food processor bowl.
- Airtight Container: For storing your processed garlic.
- Optional: Olive oil, a pinch of salt, lemon juice.
Step 1: Choose Your Garlic Wisely
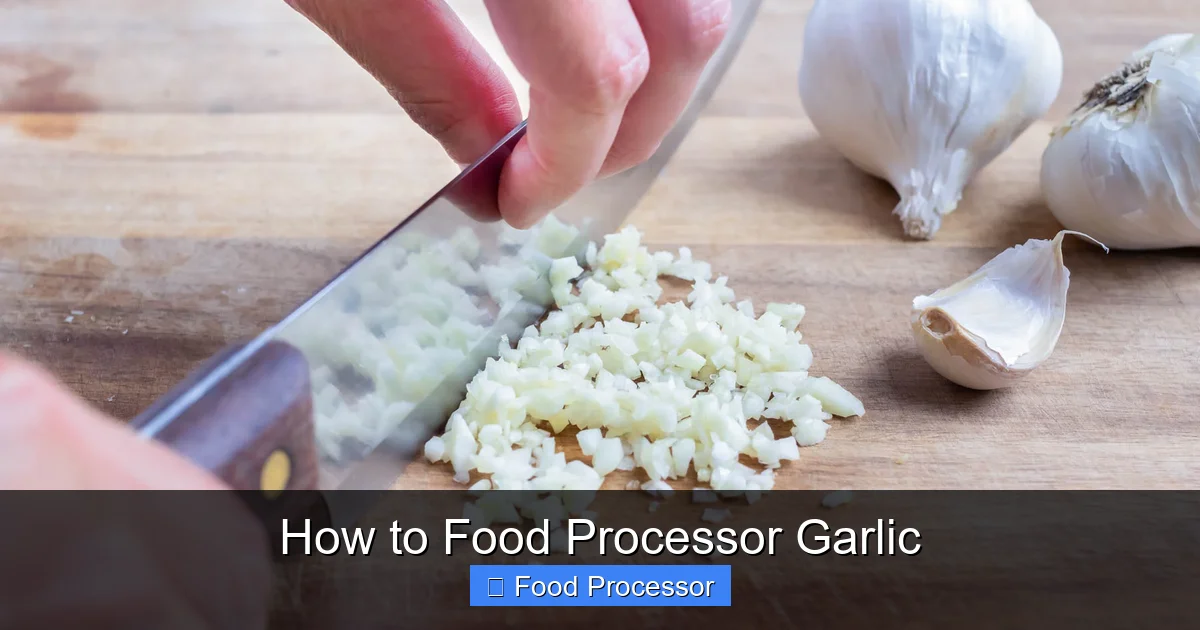
Visual guide about How to Food Processor Garlic
Image source: recipes.net
The quality of your finished product starts with the quality of your ingredients.
Select Fresh, Firm Garlic
Always pick garlic bulbs that are firm to the touch. Avoid any that feel soft, squishy, or have visible sprouts or mold. A fresh garlic bulb will have tight, papery skin and a strong, clean garlic scent when broken open.
Step 2: Prepare the Garlic

Visual guide about How to Food Processor Garlic
Image source: i.pinimg.com
This is arguably the most “hands-on” part of the process, but your food processor will take over soon enough!
Separate the Cloves
Gently break apart the garlic bulb to separate the individual cloves. You can do this by hand, or by giving the bulb a firm whack with the heel of your hand or the flat side of a chef’s knife.
Peel the Garlic Cloves
Peeling garlic can be tedious, but there are a few tricks to make it easier:
- The Smash Method: Place a garlic clove on your cutting board. Lay the flat side of your chef’s knife over the clove and give it a firm smash with the palm of your hand. The skin will loosen, making it easy to peel off. This is one of the quickest methods.
- The Bowl Shake Method: If you have a lot of garlic, place all the cloves in two metal bowls (or a large jar with a lid). Invert one bowl over the other to create a sealed container, then shake vigorously for 15-30 seconds. The skins will often come right off!
- Blanching (for large quantities): Briefly drop garlic cloves into boiling water for 10-15 seconds, then transfer them to an ice bath. The skins will slip right off.
Trim the Ends
Once peeled, use your knife to trim off the tough, woody root end from each clove. This ensures a smoother consistency and prevents any fibrous bits from ending up in your final product.
Step 3: Assemble Your Food Processor
Safety and proper assembly are crucial before operating any kitchen appliance.
Secure the Bowl and Blade
Make sure your food processor base is stable on a flat surface. Place the processing bowl onto the base, twisting it clockwise until it locks securely into place. Then, carefully place the S-shaped blade (also known as the chopping blade) onto the central spindle inside the bowl. Ensure it sits flush and is stable. Finally, secure the lid onto the bowl, making sure it locks into place. Most food processors have safety mechanisms that prevent them from operating if the bowl and lid are not correctly assembled. If you’re unsure, you can always refer to our detailed guide on how to assemble your food processor step by step for visual instructions.
Step 4: Load the Garlic into the Food Processor
Now for the fun part!
Add Garlic to the Bowl
Carefully place your peeled and trimmed garlic cloves into the food processor bowl.
Consider Quantity
The amount of garlic you put in matters.
- Don’t Overload: Filling the bowl too much can lead to uneven processing, where some garlic is pureed while other pieces remain chunky.
- Don’t Underload: If you only put in one or two cloves into a large food processor, the blade might not effectively catch them, leaving them mostly intact. For very small quantities, adding a tablespoon of olive oil can help the blade get a better grip.
Step 5: Process the Garlic
This is where your food processor truly shines, transforming whole cloves into a usable form in seconds.
Use the Pulse Function
The “pulse” button is your best friend when processing garlic. Instead of running the food processor continuously, pulsing allows for short bursts of power, giving you more control over the consistency.
- Short Bursts: Start with 5-10 quick pulses.
- Scrape and Check: Stop the food processor, remove the lid, and use your rubber spatula to scrape down any garlic stuck to the sides of the bowl or the lid. This ensures even processing.
- Repeat: Continue pulsing in short bursts, scraping down the sides after every few pulses, until you reach your desired consistency.
Achieving Desired Consistency:
- Roughly Chopped: A few pulses will give you a coarse chop, great for dishes where you want bigger pieces of garlic.
- Minced: More pulses, perhaps 10-15 with scraping, will result in finely minced garlic, perfect for most recipes.
- Garlic Paste: For a smooth paste, continue pulsing until very fine. This is often where a little liquid helps (see Step 6).
Step 6: Adding Liquids for Finer Paste or Preservation (Optional)
Sometimes, a little extra help can make a big difference, especially for a smooth paste or for long-term storage.
Adding Olive Oil
For a very fine garlic paste, or if you plan to store your garlic for a longer period, adding a tablespoon or two of olive oil can be beneficial.
- Smoother Consistency: The oil helps the blade glide through the garlic, creating a silkier, more uniform paste.
- Flavor Enhancement: Olive oil adds a rich flavor and can help carry the garlic’s aromatics.
- Preservation: Storing garlic submerged in oil can extend its shelf life in the refrigerator and is also great for freezing. However, be mindful of safe storage practices to avoid botulism risks; always refrigerate and use within a week, or freeze immediately.
Add the oil through the feed tube while pulsing, or simply add it to the bowl with the garlic before you begin.
Other Liquids (Use Sparingly)
A tiny splash of lemon juice can add brightness to your garlic paste, especially if you’re making a vinaigrette or a sauce. Water can also be used, but it can make the paste too watery and reduce its shelf life. Stick to oil for best results.
Step 7: Check and Adjust Consistency
Once you think you’re close to your desired texture, it’s time for a final check.
Inspect Visually
Remove the lid and take a good look at the garlic. Are there any large chunks remaining? Is it as fine as you want it?
Re-pulse if Needed
If it’s not quite there, replace the lid and give it a few more pulses, remembering to scrape down the sides again. Be careful not to over-process, as garlic can quickly turn into a bitter, watery mush if overworked. You want processed garlic, not garlic soup!
Step 8: Remove and Store Your Processed Garlic
Congratulations, you’ve successfully food processed your garlic! Now, let’s get it ready for your next culinary adventure.
Carefully Remove the Blade
Always be cautious when handling the S-blade; it’s very sharp. Gently lift the blade from the central spindle.
Scrape Out the Garlic
Use your rubber spatula to scrape all the processed garlic into your chosen storage container. Get into all the nooks and crannies of the bowl and under the blade.
Storage Methods
Proper storage is key to maintaining freshness and flavor.
- Refrigerator (Short-Term): For use within a few days to a week, store your processed garlic in an airtight container in the refrigerator. If you’ve added olive oil, ensure it’s fully submerged and keep an eye out for any signs of spoilage.
- Freezer in Oil (Long-Term): For longer storage (up to several months), place the processed garlic into small containers or freezer-safe bags, preferably covered with a thin layer of olive oil. This prevents freezer burn and makes it easy to scoop out individual portions.
- Freezer in Ice Cube Trays: An excellent method for pre-portioned garlic! Spoon the processed garlic into ice cube trays (you can even add a little olive oil to each compartment). Once frozen solid, pop out the garlic cubes and transfer them to a freezer-safe bag. You’ll have convenient garlic portions ready to drop directly into your cooking!
Tips for Success with Food Processor Garlic
Here are some extra nuggets of wisdom to help you master the art of food processor garlic.
- Don’t Over-Process: This is the golden rule. Over-processing garlic can release too much of its bitter compounds and turn it into a watery, acrid paste. Short, controlled pulses are always best.
- Scrape Sides Frequently: This can’t be stressed enough. It ensures an even texture and prevents chunks from remaining unprocessed.
- Process in Batches (If Needed): If you have a huge amount of garlic, it’s better to process it in smaller, manageable batches rather than trying to cram it all in at once. This ensures consistent results and prevents overworking your appliance. To truly make the most of your appliance for all sorts of culinary adventures, it’s worth exploring how to get the most out of your food processor for efficiency in other tasks too.
- Add a Pinch of Salt: A tiny bit of coarse salt added with the garlic can act as an abrasive, helping to break down the cloves more effectively and create a finer paste.
- Clean Immediately: Garlic has a strong odor that can linger on plastic parts. Clean your food processor bowl, lid, and blade immediately after use with warm, soapy water to prevent odor absorption. For stubborn odors, you can try washing with a paste of baking soda and water.
- Start Small for Small Batches: If you only have a few cloves and a large food processor, adding a teaspoon or two of olive oil can help the S-blade catch the small amount of garlic better.
Troubleshooting Common Issues
Even with the best intentions, you might run into a snag or two. Here’s how to troubleshoot them.
Garlic Not Processing Evenly
- Issue: Some pieces are minced, others are still chunky.
- Solution: You likely haven’t scraped down the sides enough, or you’re not using the pulse function effectively. Stop, scrape down the bowl thoroughly, and then continue with short, controlled pulses. Also, ensure you have enough garlic for the blade to properly circulate and chop.
Garlic Paste is Too Watery
- Issue: Your garlic has turned into a thin, watery liquid rather than a paste.
- Solution: This usually happens from over-processing or adding too much liquid. If it’s too late, you can try to drain some of the excess liquid if possible, or adjust your recipe to account for the extra moisture. For next time, remember to use only short pulses and add very minimal liquid (if any).
Food Processor Not Turning On
- Issue: You’ve loaded the garlic, but the food processor won’t start.
- Solution: Most likely, the bowl or lid is not securely locked into place. Check all safety latches. Also, ensure it’s plugged in correctly. If you’re still facing issues, our guide on what to do if your food processor won’t turn on can provide more in-depth solutions.
Garlic Stuck Under the Blade
- Issue: Garlic pieces get lodged under the S-blade and aren’t getting processed.
- Solution: This can happen if you have too little garlic, or if it’s packed too densely. Stop the machine, remove the blade (carefully!), and redistribute the garlic. Adding a small amount of liquid (like olive oil) can also help the garlic circulate better.
Conclusion
Learning how to food processor garlic is a simple skill that delivers huge returns in your kitchen. It transforms a fiddly, time-consuming task into a quick and effortless one, leaving you with perfectly processed garlic and more time to enjoy cooking. No more sticky hands, no more uneven chops, just consistent, delicious garlic ready to elevate your meals.
So, next time your recipe calls for minced or pasted garlic, don’t reach for the knife – reach for your food processor! With these tips and steps, you’ll be a garlic-processing pro in no time, ready to infuse your dishes with that unmistakable pungent flavor. Happy cooking!