
Finding the best food processor for kneading dough can revolutionize your baking. This guide will walk you through identifying powerful models with the right capacity and essential accessories like a dough blade. Learn how to efficiently knead various dough types, saving you time and effort while achieving consistently excellent results for breads, pizzas, and pastries.
Best Food Processor for Kneading Dough
Are you tired of the messy, time-consuming process of kneading dough by hand? Do you dream of effortlessly whipping up homemade bread, pizza, or pastry dough? If so, then a food processor designed for kneading dough might just be your new best friend in the kitchen!
Welcome to our comprehensive guide on finding and using the best food processor for kneading dough. We know how challenging it can be to get that perfect, elastic dough texture without hours of strenuous work. That’s why we’re here to show you exactly what to look for in a food processor and how to master the art of machine-kneading. By the end of this guide, you’ll be well-equipped to choose the right appliance and confidently make a variety of delicious doughs, saving you time and effort while achieving consistent, fantastic results.
Let’s dive in and transform your baking experience!
Key Takeaways
- Motor Power is Paramount: For effective dough kneading, a food processor needs a powerful motor (at least 600-700 watts, ideally 1000W+) to handle the dense, sticky nature of dough without overheating or struggling.
- Look for a Dedicated Dough Blade: The ‘dough blade’ or ‘plastic blade’ is crucial. Unlike the S-blade, it’s designed to mimic hand kneading, pushing and folding the dough rather than chopping it, which develops gluten properly.
- Optimal Bowl Capacity Matters: Choose a bowl size (10-14 cups) that accommodates your typical dough batch without overfilling, allowing sufficient space for the dough to move and form properly.
- Sturdy Construction and Stability are Key: A heavy base and robust construction prevent the food processor from “walking” or vibrating excessively during the strenuous kneading process, ensuring safety and durability.
- Follow Step-by-Step Kneading Instructions: Proper technique, including adding liquids gradually and using the pulse function, is vital for achieving the correct dough consistency and preventing motor strain.
- Don’t Over-Process: Unlike chopping vegetables, dough requires careful attention. Over-processing can lead to tough, overworked dough, so always monitor its texture closely.
Why Use a Food Processor for Kneading Dough?
For centuries, kneading dough was a manual labor of love, requiring strong arms and patience. While still a cherished tradition for many, it can be a significant barrier for others. This is where the mighty food processor steps in.
Efficiency and Speed
One of the biggest advantages is speed. A good food processor can knead dough in minutes, often much faster than hand kneading. This means less time in the kitchen and more time enjoying your delicious creations.
Consistency
Food processors provide a consistent kneading action, which helps develop gluten evenly throughout the dough. This often leads to a more uniform texture and better rise in your baked goods.
Less Mess
Say goodbye to flour-dusted countertops and sticky hands! Kneading in a food processor keeps most of the mess contained within the bowl, making cleanup a breeze.
Accessibility
For those with physical limitations, hand kneading can be difficult or impossible. A food processor opens up the world of homemade bread and pastries to everyone. If you’re curious about what to do if you don’t have a food processor for dough, we have a guide for that too! What To Do If You Don’t Have A Food Processor For Dough.
Key Features to Look For in a Food Processor for Dough
Not all food processors are created equal when it comes to dough. To find the best food processor for kneading dough, pay close attention to these critical features:
H2.1. Motor Power
This is arguably the most important factor. Kneading dough, especially stiff or thick varieties, puts a lot of strain on a motor.
- Minimum Wattage: Look for at least 600-700 watts. Anything less might struggle, overheat, or even burn out with regular dough kneading.
- Ideal Wattage: Processors with 1000 watts or more are excellent for dough, offering robust performance and longevity. These will handle even the toughest doughs with ease.
H2.2. Bowl Capacity
The size of the work bowl dictates how much dough you can make at once.
- For most home bakers: A 10-cup to 14-cup capacity is ideal. This size is large enough to handle a standard loaf of bread or pizza dough without overfilling, yet not so large that it takes up too much counter space.
- For smaller batches: If you often bake for one or two people, a smaller capacity might suffice, but ensure it’s still robust enough for dough. You can find options if you’re looking for the best food processor for small quantities.
- Avoid Mini Processors: While great for small tasks, mini food processors generally lack the power and capacity for dough.
H2.3. Dedicated Dough Blade (Plastic Blade)
This is non-negotiable. While the standard S-blade is fantastic for chopping, it will cut through your dough instead of kneading it.
- What to look for: A plastic dough blade, often shaped differently from the metal S-blade. It’s designed to push, fold, and stretch the dough, mimicking the action of hands and effectively developing gluten.
- Check accessories: Make sure the food processor explicitly states it includes a dough blade.
H2.4. Sturdy Construction and Stability
Dough can make a food processor vibrate and “walk” across the counter.
- Heavy Base: A heavy, stable base with good suction feet is essential to keep the machine firmly in place during operation.
- Durable Materials: Look for sturdy, high-quality plastics and metals that can withstand the demands of frequent use.
H2.5. Multiple Speed Settings and Pulse Function
While dough kneading usually requires a consistent speed, a pulse function is invaluable.
- Pulse: Use pulse to initially combine ingredients and to prevent over-processing. It gives you precise control over the kneading process.
- Low/High Speeds: Some doughs might benefit from a slightly lower or higher speed, though most will be kneaded at a medium-high setting.
Top Characteristics of Food Processors Ideal for Kneading Dough
While we won’t recommend specific models, understanding the characteristics of top-performing brands will help you make an informed decision:
Professional-Grade Durability
Many high-end food processors are built with commercial-grade components, ensuring they can stand up to regular, demanding tasks like dough kneading. These are often the best food processor for thick dough recipes.
Efficient Design
Look for brands known for thoughtful design, where the motor is well-ventilated to prevent overheating and the bowl and lid seal securely.
Ease of Cleaning
Dishwasher-safe parts are a huge bonus, especially after working with sticky dough.
How to Knead Dough in a Food Processor: A Step-by-Step Guide
Once you have your ideal food processor, mastering the technique is simple. Here’s how to do it:
H3.1. Gather Your Ingredients and Equipment
Ensure all your ingredients are measured accurately and ready to go. You’ll need your food processor, the dough blade, and your recipe’s ingredients (flour, yeast, sugar, salt, water/milk, fat).
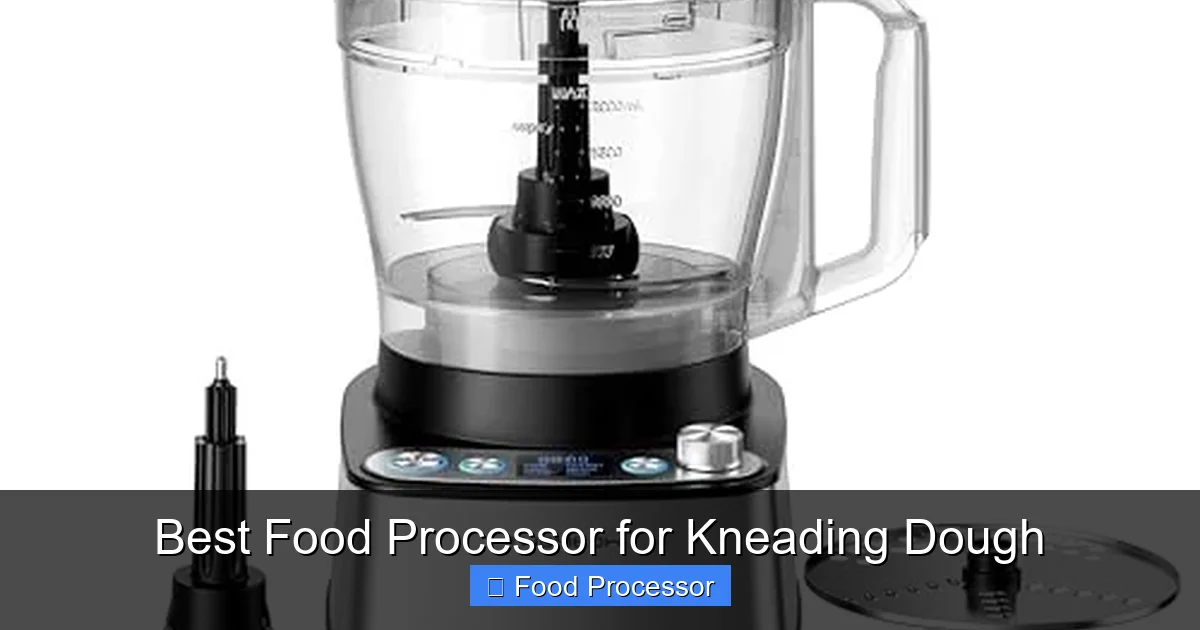
Visual guide about Best Food Processor for Kneading Dough
Image source: m.media-amazon.com
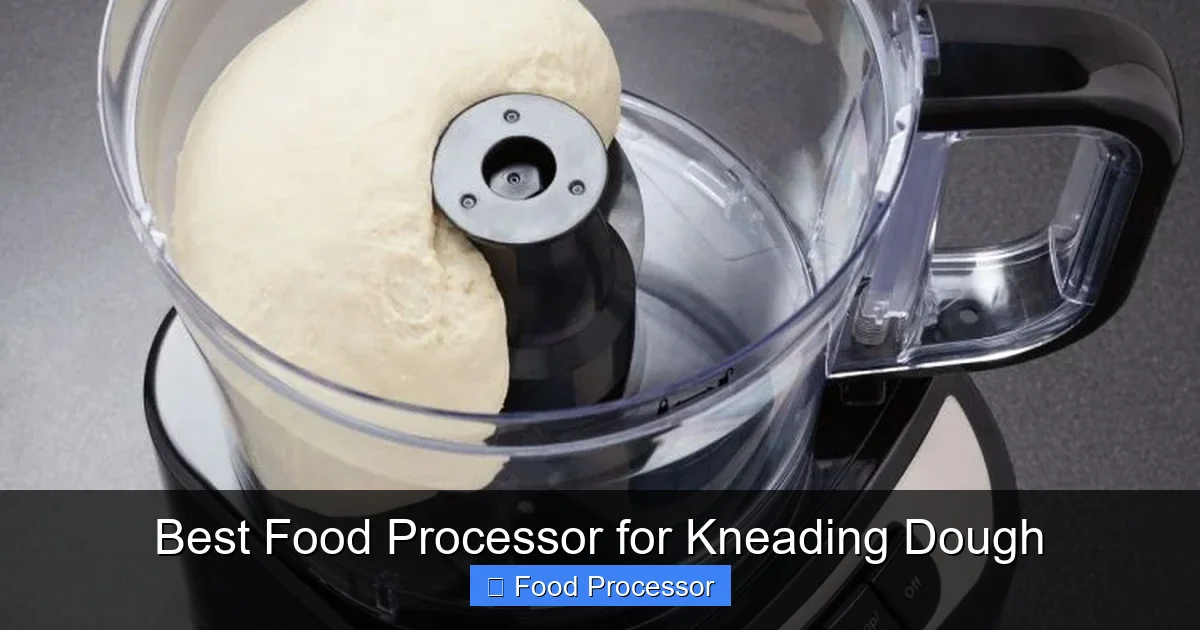
Visual guide about Best Food Processor for Kneading Dough
Image source: grindiit.com
H3.2. Assemble Your Food Processor
Place the work bowl securely on the motor base. Insert the plastic dough blade onto the spindle. Make sure the lid is ready to lock into place.
H3.3. Add Dry Ingredients
Add all your dry ingredients (flour, sugar, salt, yeast) into the food processor bowl. Pulse a few times to combine them thoroughly. This ensures even distribution before liquids are added.
H3.4. Add Wet Ingredients Gradually
With the food processor running on a continuous low or medium setting (or using the pulse function), slowly pour the liquid ingredients (water, milk, oil, eggs) through the feed tube. Add just enough liquid for the dough to come together.
Tip: Always start with slightly less liquid than the recipe calls for, especially for wetter doughs. You can always add more, but you can’t easily remove it.
H3.5. Process the Dough
Once the dough begins to form, continue processing. The dough will typically gather into a ball and then “ride” on top of the dough blade, sometimes hitting the sides of the bowl. This is the kneading action.
- Observe the Dough: Watch how the dough behaves. It should look elastic and smooth.
- Processing Time: Most doughs will be fully kneaded in 60 seconds to 2 minutes in a powerful food processor. Over-processing can lead to tough dough.
H3.6. Check the Dough Consistency
Stop the processor and check your dough.
- Too Sticky: If it’s too sticky and clings excessively to your fingers, add a tablespoon of flour at a time and pulse until it reaches the right consistency.
- Too Dry: If it’s too crumbly or doesn’t form a cohesive ball, add a teaspoon of liquid at a time and process until it’s smooth and elastic.
- The Windowpane Test: A good sign of well-kneaded dough is the “windowpane test.” Take a small piece of dough and gently stretch it. If you can stretch it thin enough to see light through it without tearing, your dough is perfectly kneaded.
H3.7. Remove and Rest
Once kneaded, carefully remove the dough from the food processor bowl. Lightly oil a clean bowl, place the dough in it, turn it once to coat, and cover with plastic wrap or a damp cloth. Let it rise in a warm place according to your recipe’s instructions.
Practical Tips for Success with Food Processor Dough
- Don’t Overload the Bowl: Respect your food processor’s capacity. Overloading can strain the motor and prevent proper kneading. If you need to make a large batch, divide the ingredients and knead in two separate batches.
- Use Cold Water/Liquids: For yeast doughs, using cold water or milk can help prevent the dough from getting too warm during the kneading process, which can negatively impact yeast activity.
- Scrape Down the Sides (if needed): Sometimes, flour or dough bits might stick to the sides of the bowl. Stop the processor, scrape them down with a spatula, and continue processing.
- Understand Different Dough Types: A food processor excels with most standard bread, pizza, and pastry doughs. However, some very stiff doughs (like certain bagel or pretzel doughs) or very wet, sticky doughs might require slight adjustments or a bit more attention. For instance, making roti dough in a food processor can be very efficient, but it requires understanding its specific hydration needs.
- Keep an Eye on the Motor: If you hear the motor straining excessively or smell anything unusual, stop the processor immediately. This often indicates the dough is too stiff, or the machine is overloaded.
Troubleshooting Common Dough Kneading Issues
Dough Too Sticky
If your dough is too sticky and won’t form a ball, it likely has too much liquid. Add flour, one tablespoon at a time, and pulse briefly until the dough comes together and cleans the sides of the bowl.
Dough Too Dry/Crumbly
If your dough is a collection of dry crumbs, it needs more liquid. Add water or milk, one teaspoon at a time, through the feed tube with the processor running until a cohesive ball forms.
Motor is Struggling or Overheating
This usually means the dough is too stiff for your processor’s motor, or you’ve overloaded the bowl. If the motor sounds like it’s working too hard, stop. Divide the dough into smaller batches if necessary. Allow the motor to cool down if it feels hot.
Dough Not Forming a Ball
This can be due to either too much or too little liquid, as described above. Ensure you’ve added enough liquid for the ingredients to hydrate and come together. If it’s mostly liquid and still not forming a ball, you might need a bit more flour. If it’s very dry and crumbly, it definitely needs more liquid.
Cleaning Your Food Processor After Dough Kneading
Cleaning up after dough can be surprisingly easy, especially if you act quickly.
- Remove Dough Promptly: Don’t let dough dry onto the blade or bowl. Remove it as soon as you’re done.
- Scrape Off Excess: Use a spatula to scrape off as much dough as possible into the trash or compost.
- Rinse Immediately: Rinse the bowl, lid, and dough blade under warm running water. This prevents remaining dough from hardening.
- Dishwasher Safe: Most food processor bowls, lids, and blades are dishwasher safe. Check your manufacturer’s instructions. If not, wash by hand with warm, soapy water.
- Wipe Down Base: Use a damp cloth to wipe down the motor base. Never submerge the motor base in water.
Conclusion
Congratulations! You’ve just learned everything you need to know about selecting and using the best food processor for kneading dough. By choosing an appliance with a powerful motor, adequate capacity, and that essential dough blade, you can transform your baking routine. No more aching arms or messy countertops – just perfectly kneaded dough ready for your culinary adventures.
Embrace the convenience and consistency that a food processor brings to dough making. Whether you’re whipping up a quick pizza for family night, a rustic loaf of artisan bread, or delicate pastries, your food processor will be an indispensable tool. Happy baking!