
A Kenwood food processor is a versatile kitchen appliance designed to simplify food prep through powerful motor-driven blades and discs. Understanding how a Kenwood food processor works involves proper assembly, selecting the right attachments for tasks like chopping, slicing, or kneading, and mastering its controls. This guide will walk you through everything you need to know to confidently use and maintain your appliance for delicious results.
How Does Kenwood Food Processor Work
Have you ever wondered how those magical kitchen gadgets make food prep so much easier? If you own a Kenwood food processor, or are thinking of getting one, you’re in for a treat! These machines are true workhorses, capable of transforming tedious chopping, slicing, and mixing into quick, effortless tasks. But to truly harness their power, it’s important to understand not just what they do, but exactly how they do it.
This comprehensive guide will demystify your Kenwood food processor. We’ll explore the basic principles behind its operation, walk you through step-by-step usage, introduce you to its versatile attachments, and even share some valuable tips and troubleshooting advice. By the end, you’ll feel confident and inspired to tackle any recipe with your Kenwood food processor.
Key Takeaways
- Understanding Core Mechanics: A Kenwood food processor utilizes a powerful motor in its base to rotate interchangeable blades or discs within a processing bowl, allowing for efficient chopping, slicing, shredding, and kneading.
- Prioritize Safety: Always ensure the food processor is unplugged during assembly and cleaning, and never operate it without the bowl and lid securely locked in place, engaging the safety interlock system.
- Correct Assembly is Crucial: Proper assembly, including seating the bowl, inserting the correct blade/disc, and locking the lid, is essential for the Kenwood food processor to function and activate its safety mechanisms.
- Master Attachments: Familiarize yourself with the various attachments – like the S-blade for chopping/pureeing, different shredding/slicing discs, and dough blades – to perform specific tasks effectively.
- Utilize Pulse and Continuous Settings: The pulse function offers precise control for coarse chopping or avoiding over-processing, while the continuous setting is ideal for smoother purees or longer tasks.
- Prepare Ingredients Thoughtfully: Cut larger ingredients into manageable, uniform pieces before processing to ensure even results and prevent overloading the motor.
- Regular Cleaning and Maintenance: Disassemble and clean all removable parts promptly after each use, following manufacturer guidelines, to maintain hygiene and prolong the life of your Kenwood food processor.
The Core Mechanics: Powering Your Kenwood Food Processor
At its heart, a Kenwood food processor is a powerful motor encased in a sturdy base. This motor connects to a central spindle that extends up into the processing bowl. When you switch the machine on, the motor spins this spindle, which in turn rotates a chosen attachment – be it a sharp blade or a disc – at high speeds.
The magic happens as food comes into contact with these rapidly moving blades or discs. For chopping, the S-shaped blade cuts ingredients into smaller and smaller pieces. For slicing or shredding, specific discs with sharp edges or grates evenly process food as it’s pushed through a feed tube. The design of the bowl and lid also plays a crucial role. The bowl typically locks onto the base, and the lid then locks onto the bowl. This isn’t just for containment; it’s a critical safety feature. Most Kenwood food processors include a safety interlock system that prevents the motor from starting unless both the bowl and lid are correctly assembled and locked into place. This ensures that you can’t accidentally activate the blades when your hands are near them. It’s a smart design that keeps you safe while you work.
Before You Start: Safety First
Visual guide about How Does Kenwood Food Processor Work
Image source: afifitani.com
Before you even think about plugging in your Kenwood food processor, safety should be your top priority. These machines are incredibly powerful and feature very sharp blades.
Unplugged for Safety
Always ensure your food processor is unplugged from the power outlet before assembling, disassembling, or cleaning it. This prevents any accidental activation of the motor, which could lead to serious injury.
Read Your Manual
Every Kenwood model is slightly different. Take a few minutes to read your specific product’s instruction manual. It will provide detailed safety warnings, specific assembly instructions, and care guidelines tailored to your appliance.
Sharp Blades
The blades and discs are extremely sharp. Handle them with extreme care, always holding them by their plastic hubs, not the cutting edges. Store them safely when not in use, preferably in their designated storage box if one was provided.
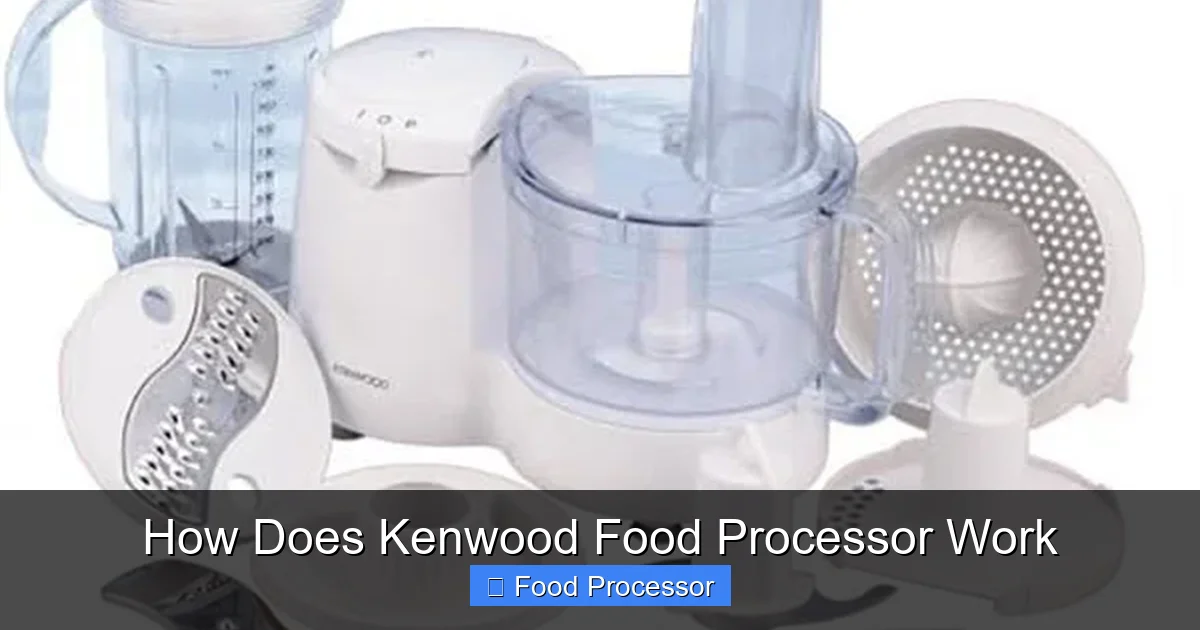
Step 1: Familiarizing Yourself with Your Kenwood Food Processor

Visual guide about How Does Kenwood Food Processor Work
Image source: theculinarium.co.za
Before you dive into cooking, take a moment to get to know the parts of your Kenwood food processor. You’ll typically find:
- The Motor Base: The heaviest part, containing the motor and controls (on/off, pulse, speed settings).
- The Processing Bowl: A clear bowl that locks onto the motor base.
- The Lid: Fits securely onto the processing bowl and usually has a feed tube.
- The Pusher: Fits into the feed tube to guide ingredients towards the blades or discs.
- Attachments: Various blades and discs for different tasks (e.g., S-blade, slicing disc, shredding disc, dough blade).
Knowing these components will make assembly and operation much smoother.
Step 2: Assembling Your Kenwood Food Processor
Proper assembly is key for both safety and performance. Let’s break down how to assemble a food processor step-by-step.
Attaching the Bowl
First, place the processing bowl onto the motor base. Most Kenwood models require you to align the handle of the bowl with a specific mark or slot on the base, then twist it clockwise until it locks securely into place. You’ll often hear a click or feel it firmly seat. If the bowl isn’t locked, the machine won’t turn on due to the safety interlock.
Inserting the Blade or Disc
This is where you choose your weapon for the task!
- For Chopping, Pureeing, or Mixing: Carefully place the S-shaped blade (sometimes called a multi-purpose blade or knife blade) onto the central spindle inside the bowl. Gently push it down until it sits firmly.
- For Slicing or Shredding: First, insert the plastic drive shaft (if your model uses one) onto the central spindle. Then, carefully place the desired slicing or shredding disc onto the drive shaft. Ensure it’s seated correctly. Remember, the cutting edge of the disc should always face upwards, towards the lid.
Securing the Lid
Once the blade or disc is in place, carefully put the lid onto the processing bowl. Just like the bowl, the lid usually needs to be aligned with a specific point (often indicated by an arrow or symbol) and then twisted clockwise until it locks. Again, you’ll feel a click. If the lid isn’t properly locked, the safety interlock will prevent the motor from starting. This is a very common reason why your Kenwood food processor might not seem to be working.
Step 3: Preparing Your Ingredients
Proper ingredient preparation ensures even results and protects your machine.
Cut to Size
For most tasks, cut larger ingredients into uniform, manageable pieces that will fit comfortably through the feed tube (if using a disc) or allow the S-blade to process them efficiently. Overloading the bowl or trying to process very large chunks can strain the motor.
Don’t Overfill
Respect the “Max Fill” line on your processing bowl. Overfilling can lead to uneven processing, leakage, or stress on the motor. When blending liquids, be especially mindful of the maximum liquid capacity.
Step 4: Operating Your Kenwood Food Processor
Now that everything is assembled and your ingredients are ready, it’s time to process!
Connecting to Power
Plug your Kenwood food processor into a grounded electrical outlet.
Using the Pulse Function
The pulse function is your best friend for precise control. Instead of running continuously, the motor activates only as long as you hold down the ‘pulse’ button or lever, and stops when you release it.
- When to Use: Ideal for coarse chopping, mincing, or when you want to avoid over-processing ingredients. Think chunky salsa, breadcrumbs, or roughly chopped onions.
- Technique: Use short, quick bursts. Check the consistency of your food between pulses. A common mistake is to hold the pulse button for too long, which can quickly turn chunky ingredients into a puree.
Continuous Processing
For tasks requiring a finer texture, or when blending liquids, the continuous setting (usually marked ‘On’ or with a specific speed number) is appropriate.
- When to Use: Perfect for creating smooth purees, nut butters, fine pestos, or kneading dough (with the appropriate blade).
- Technique: Turn the machine on and let it run until you achieve the desired consistency. Monitor the process through the clear bowl.
Using the Feed Tube and Pusher
When using slicing or shredding discs, or when adding ingredients during continuous processing, the feed tube comes into play.
- For Discs: Place your prepared ingredients into the feed tube. Use the pusher to guide them down evenly towards the spinning disc. Never use your fingers or other utensils to push food into the feed tube while the machine is running. The pusher is designed for safety and efficiency.
- Adding Liquids: Many lids have a small opening or a measuring cup within the pusher that allows you to drizzle liquids (like oil for mayonnaise or sauces) into the bowl while the processor is running. This creates perfect emulsions.
Many people wonder how to use a food processor to chop vegetables effectively. The key is to use the pulse function for precise control.
Step 5: Understanding Different Attachments and Their Uses
The versatility of your Kenwood food processor largely comes from its range of attachments.
The S-Blade (Multi-Purpose Blade)
This is the most common and often used attachment.
- Chopping: Onions, garlic, carrots, herbs, nuts, crackers for breadcrumbs. Use pulse for coarse chops, continuous for finer mincing.
- Pureeing: Cooked vegetables for soups, baby food, hummus, fruit sauces. Run continuously until smooth.
- Mixing: Cake batters, cookie doughs (for softer doughs, a dough blade might be better for stiffer ones), dips, spreads.
- Grinding: Small amounts of meat or hard cheeses (ensure no bones or extremely hard items).
Slicing and Shredding Discs
These discs sit on top of the drive shaft. Your Kenwood might come with several options:
- Slicing Discs: Produce even slices of vegetables like cucumbers, potatoes, carrots, or fruits like apples. They often come in different thicknesses.
- Shredding/Grating Discs: Ideal for shredding cheese, carrots, cabbage (perfect for coleslaw!), potatoes, or other firm vegetables. Again, these often come with different grating sizes (fine, medium, coarse).
Dough Blade (Plastic Blade)
If your Kenwood food processor includes a plastic dough blade, it’s designed specifically for kneading bread dough, pizza dough, or pastry. The plastic material is less likely to overwork the gluten compared to a metal S-blade.
- Using the Dough Blade: Combine flour, water, yeast, and other ingredients. The dough blade gently brings them together and kneads them, usually requiring less time than hand kneading.
Whisk/Emulsifying Disc
Some models include a whisk attachment or emulsifying disc, often a plastic disc with a central hole.
- Emulsifying: Excellent for making mayonnaise, vinaigrettes, or creamy sauces.
- Whisking: Can whip cream or egg whites, though a stand mixer is often more efficient for large volumes.
Step 6: Cleaning and Storage
Cleaning your Kenwood food processor immediately after use is crucial for hygiene and preventing food from drying onto parts.
Disassembly
Unplug the unit. Carefully disassemble all removable parts: lid, pusher, blade/disc, and processing bowl. Handle blades with extreme caution.
Washing
Most removable parts are dishwasher safe, but always check your manual first. Otherwise, wash them by hand in warm, soapy water. Use a brush to safely clean around sharp edges. The motor base should only be wiped clean with a damp cloth; never immerse it in water.
Drying and Storage
Ensure all parts are completely dry before reassembling or storing. Store blades and discs safely to prevent accidental cuts. Some Kenwood models come with storage boxes for attachments. Store your food processor in a clean, dry place, ready for its next use!
Kenwood Food Processor Troubleshooting Tips
Even with the best intentions, you might encounter a hiccup or two. Here are common issues and solutions:
My Kenwood Food Processor Won’t Start. What’s Wrong?
- Power: Check if it’s plugged in correctly.
- Safety Interlock: This is the most common reason. Ensure the bowl is securely locked onto the base, and the lid is securely locked onto the bowl. If even slightly misaligned, the safety mechanism won’t allow the motor to engage.
- Overload Protection: Some models have an overload protection switch. If the motor was strained (e.g., trying to process too much or too hard ingredients), it might have tripped. Unplug, let it cool for 15-30 minutes, remove some ingredients, and try again.
If the blade isn’t spinning, even if the motor is humming, you might need to investigate further. You can learn how to fix a food processor blade not spinning by checking for obstructions or ensuring the blade is properly seated on the spindle.
Uneven Chopping/Processing
- Too Many Ingredients: Don’t overfill the bowl. Process in smaller batches.
- Ingredients Too Large/Uneven: Cut ingredients into more uniform, smaller pieces before adding them.
- Insufficient Pulsing: For chopping, use quick pulses rather than continuous running.
- Wrong Blade: Ensure you’re using the S-blade for chopping; a dough blade won’t chop effectively.
Vibration or Excessive Noise
- Uneven Load: Distribute ingredients evenly in the bowl.
- Loose Parts: Check that the bowl and lid are securely locked.
- Hard Ingredients: Some very hard ingredients might cause more vibration.
If your food processor stopped working entirely, separate from a blade issue, it might be a more general power or motor problem. It’s often helpful to consult your manual or contact Kenwood customer support for more complex issues.
Pro Tips for Optimal Kenwood Food Processor Performance
To truly get the most out of your Kenwood food processor, keep these tips in mind:
Process in Batches
Especially for larger quantities or tougher ingredients, processing in smaller batches prevents overloading the motor and ensures more even results. This also extends the lifespan of your appliance.
Chill for Better Shredding/Slicing
For soft cheeses, cooked meats, or very soft vegetables, chilling them in the freezer for 15-30 minutes before processing can make them firmer and easier to slice or shred cleanly, reducing mushiness.
Add Liquids Gradually
When making dressings, sauces, or mayonnaise, drizzle liquids like oil through the feed tube slowly while the processor is running. This creates better emulsions.
Clean Immediately
Food, especially sticky or acidic ingredients, can dry onto parts and be harder to remove. A quick rinse or wash right after use saves a lot of scrubbing later. This is also a great way to keep your appliance in top condition, as detailed in guides about how to get the most out of your food processor.
Use the Right Attachment
Always select the correct blade or disc for the task. Using an S-blade for kneading tough dough, for instance, can overwork the gluten and damage the blade over time.
Conclusion
Your Kenwood food processor is a powerful and versatile tool designed to save you time and effort in the kitchen. By understanding how a Kenwood food processor works – from its basic motor mechanics and safety features to the proper use of its diverse attachments – you’re now equipped to tackle a wide range of culinary tasks with confidence. Remember to prioritize safety, follow the assembly steps carefully, and clean your machine regularly to ensure many years of delicious, hassle-free cooking. Happy processing!