
A Kitchenaid food processor is a versatile kitchen appliance that simplifies meal preparation by efficiently chopping, slicing, shredding, mixing, and pureeing ingredients. It operates through a powerful motor that spins various attachments like blades and discs within a work bowl. Understanding how a Kitchenaid food processor works involves recognizing its key components and mastering the proper assembly and usage techniques to achieve consistent and efficient results for a wide range of culinary tasks.
How Does Kitchenaid Food Processor Work?
Welcome to the world of efficient cooking! If you’ve ever wondered about the magic behind your Kitchenaid food processor, you’re in the right place. This guide will demystify this invaluable kitchen appliance, breaking down its inner workings, explaining its various components, and showing you exactly how to use it to revolutionize your meal prep. Whether you’re a novice cook or looking to get more out of your existing machine, understanding how a Kitchenaid food processor works is key to unlocking its full potential.
We’ll cover everything from the powerful motor that drives the blades to the clever safety features designed to keep you safe. You’ll learn about the different attachments and what they’re used for, how to assemble your Kitchenaid food processor correctly, and practical tips to ensure perfect results every time. Get ready to chop, slice, shred, and puree like a pro!
Key Takeaways
- Core Mechanism: A Kitchenaid food processor uses a powerful motor to rotate interchangeable blades or discs at high speeds, transforming ingredients within a sealed work bowl.
- Key Components: Essential parts include the motor base, work bowl, lid with safety interlock, feed tube, pusher, and various attachments like the multi-purpose blade, slicing disc, and shredding disc.
- Safety First: The appliance features a safety interlock system, preventing operation unless the work bowl and lid are correctly secured, ensuring safe use.
- Versatility through Attachments: Different blades and discs allow the Kitchenaid food processor to perform a wide array of tasks, from chopping and pureeing with the S-blade to precise slicing and shredding with discs.
- Proper Operation for Best Results: Using the correct attachment, loading ingredients appropriately, and mastering pulse vs. continuous modes are crucial for achieving desired textures and preventing over-processing.
- Maintenance is Simple: Most components are dishwasher-safe, making cleanup straightforward. Regular cleaning ensures longevity and hygienic use of your Kitchenaid food processor.
The Core Mechanics: Powering Your Prep
At its heart, a Kitchenaid food processor is a powerful machine designed to make quick work of demanding kitchen tasks. Its operation is surprisingly simple yet incredibly effective.
The Motor Base: The Brains and Brawn
The heavy, sturdy base of your Kitchenaid food processor houses a robust electric motor. This motor is the powerhouse, responsible for generating the rotational energy that spins the various attachments. Kitchenaid food processors are known for their durable, high-performance motors, which are designed to handle everything from tough doughs to hard vegetables without bogging down. The weight of the base also provides stability, preventing the appliance from “walking” across your countertop during use.
The Work Bowl: The Processing Chamber
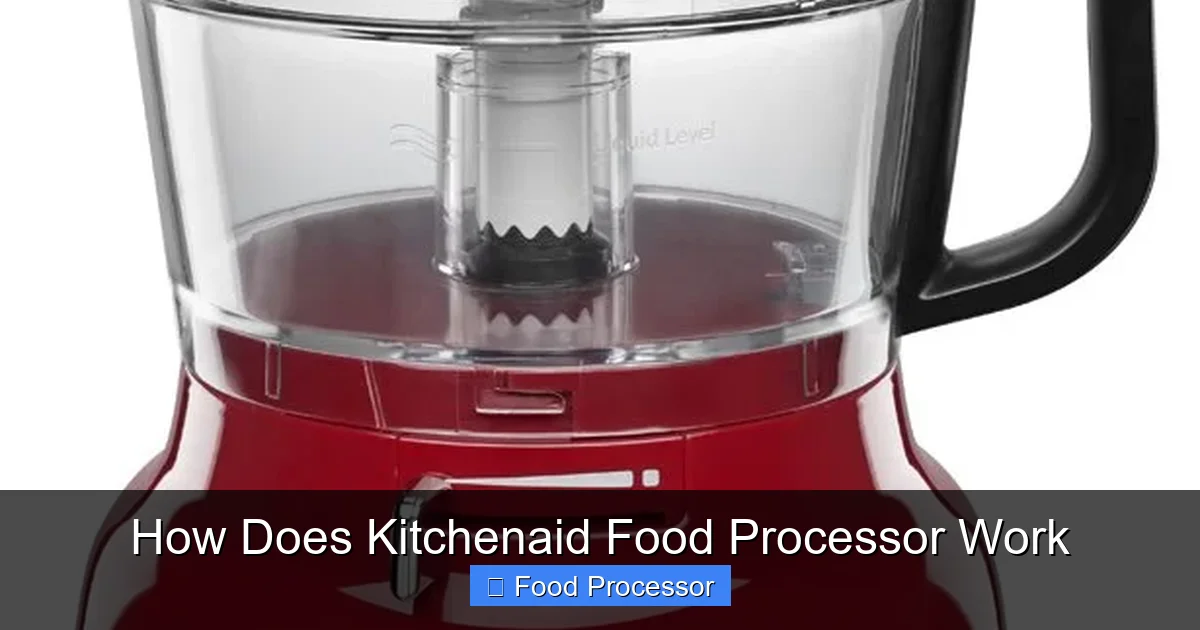
Perched atop the motor base is the work bowl, typically made from durable, clear plastic. This is where all the action happens. The work bowl attaches securely to the motor base, often with a twist-and-lock mechanism, which is part of the safety system. Inside the work bowl, a drive shaft extends from the motor, onto which you’ll place your chosen blade or disc attachment.
The Lid and Safety Interlock: Essential for Safety
The lid is more than just a cover; it’s a crucial safety component. Kitchenaid food processors, like all modern food processors, feature an interlocking safety system. This means the machine will not operate unless the work bowl is correctly seated on the motor base AND the lid is securely locked onto the work bowl. This prevents accidental contact with the moving blades, significantly enhancing user safety. The lid also contains the feed tube, a chute through which you can add ingredients while the machine is running.
The Feed Tube and Pusher: For Continuous Processing
The feed tube, located on the lid, allows you to continuously add ingredients, such as carrots for slicing or cheese for shredding, while the Kitchenaid food processor is in operation. The pusher fits snugly into the feed tube, helping to guide ingredients down towards the spinning blade or disc. It’s also part of the safety interlock on some models, ensuring your fingers stay clear of the moving parts.
Blades and Discs: The Workhorses
This is where the versatility of your Kitchenaid food processor truly shines. Different attachments perform different functions:
*
The Multi-Purpose Blade (S-Blade):
This is the most frequently used attachment. It’s a two-pronged blade shaped like an “S” and is incredibly sharp. It’s ideal for chopping, mincing, mixing, pureeing, and making dough. Think of it for making pesto, hummus, nut butters, or chopping onions and garlic.
*
Slicing Discs:
These flat, circular discs have a sharp blade embedded across them. They are used for uniformly slicing fruits and vegetables. Kitchenaid typically offers discs with adjustable slicing thicknesses or multiple fixed-thickness discs.
*
Shredding/Grating Discs:
Similar to slicing discs, these have raised perforations or grates across their surface. They are perfect for shredding cheese, carrots, cabbage, or other vegetables. Different discs offer fine, medium, or coarse shredding. For example, to shred cabbage for coleslaw, you’d typically use a medium shredding disc.
*
Dough Blade (Plastic S-Blade):
Some Kitchenaid models include a plastic S-blade designed specifically for kneading dough. Its duller edges are less likely to over-process and warm the dough, making it ideal for bread and pastry recipes.
*
Whisk/Emulsifying Disc:
Less common but found on some models, this attachment helps in whipping cream or egg whites, or emulsifying dressings.
Getting Started: Assembling Your Kitchenaid Food Processor
Before you can unleash its power, you need to properly assemble your Kitchenaid food processor. The process is straightforward and ensures safe operation. If you need a more general guide, you can always refer to articles on how to assemble a food processor step by step.
Step 1: Place the Motor Base
Position the heavy motor base on a clean, stable, and dry countertop. Ensure it’s near an electrical outlet but not plugged in yet.
Visual guide about How Does Kitchenaid Food Processor Work
Image source: images-na.ssl-images-amazon.com
Step 2: Attach the Work Bowl
Carefully place the work bowl onto the motor base. You’ll usually need to align a tab on the bottom of the work bowl with a slot on the base, then twist it clockwise until it locks securely into place. You should hear a click or feel it seat firmly.
Step 3: Insert the Drive Adapter (if applicable)
Some Kitchenaid models have a separate drive adapter that fits onto the drive shaft in the center of the work bowl. This adapter then holds the blades or discs.
Step 4: Choose and Insert the Blade or Disc
This is a critical step. Decide which task you need to perform.
- For chopping, pureeing, mixing: Carefully lower the multi-purpose (S-blade) onto the drive shaft (or drive adapter) in the center of the work bowl. Ensure it sits all the way down. Always handle blades by the plastic hub, not the sharp edges.
- For slicing or shredding: Place the desired slicing or shredding disc onto the drive adapter. The blade/grating side should face upwards towards the lid.
Step 5: Add Ingredients
- For blades: Add your ingredients directly into the work bowl around the blade. Don’t overfill past the maximum fill line indicated on the bowl.
- For discs: Place ingredients in the feed tube or have them ready to drop in once the machine starts. For tasks like chopping vegetables, ensure they are cut into pieces small enough to fit comfortably in the feed tube.
Step 6: Secure the Lid
Place the lid onto the work bowl, aligning it carefully. Twist the lid clockwise until it locks into place. Again, you should feel or hear a definite click. The safety interlock mechanism is now engaged.
Step 7: Plug In and Process
Now you can plug in your Kitchenaid food processor. Select your desired speed (low, high, or pulse) and begin processing. For quick chopping or coarse textures, use the “Pulse” function. For smoother purees or continuous slicing/shredding, use a continuous speed setting.
Step 8: Disassemble and Clean
Once you’re done, turn off and unplug the appliance. Carefully remove the lid, then the blade/disc (always handle with care!). Finally, remove the work bowl from the base. Most Kitchenaid food processor parts (work bowl, lid, blades, discs, pusher) are dishwasher-safe, typically on the top rack. Wash the motor base with a damp cloth; never immerse it in water.
Operating Your Kitchenaid Food Processor: Tips for Success
Mastering your Kitchenaid food processor means more than just turning it on. Here are some pro tips:
Pulse vs. Continuous
* Pulse: Use the pulse function for short bursts of power. This gives you greater control over the texture, preventing over-processing. It’s ideal for chopping nuts, creating a coarse salsa, or breaking down larger chunks of vegetables. A quick pulse (1-2 seconds) is usually all it takes.
* Continuous: Use continuous speed for making smooth purees, emulsifying dressings, or when using slicing and shredding discs. Don’t run the machine continuously for excessively long periods; refer to your manual for maximum continuous run times to prevent overheating.
Ingredient Preparation
* Uniform Size: For even processing, especially with blades, cut ingredients into roughly uniform sizes before adding them to the bowl.
* Don’t Overfill: Respect the maximum fill line on your work bowl. Overfilling can strain the motor, lead to uneven processing, and potentially cause leaks.
* Layering Ingredients: When using the S-blade for multiple ingredients, place harder, larger items at the bottom.
* Chilling Ingredients: For better slicing and shredding, slightly chill soft cheeses or meats before processing. This makes them firmer and less prone to crumbling.
Using the Feed Tube
* Always use the food pusher provided with your Kitchenaid food processor. Never use your hands or another utensil to push food down the feed tube while the machine is running.
* For best results with slicing or shredding, apply even, gentle pressure with the pusher. Don’t force ingredients through, as this can strain the motor and lead to uneven results or damage to the disc.
Troubleshooting Common Issues with Your Kitchenaid Food Processor
Even with a reliable Kitchenaid food processor, you might occasionally encounter minor hiccups. Here’s how to address some common problems:
Problem: My Kitchenaid food processor won’t turn on.
Solution: This is almost always related to the safety interlock system. Double-check that the work bowl is securely twisted and locked onto the motor base, and that the lid is fully locked onto the work bowl. Make sure the appliance is properly plugged into a working electrical outlet. Sometimes, older outlets or power strips can be faulty. Ensure that the pusher (if your model requires it for safety) is correctly seated in the feed tube. If your food processor stopped working, these are the first things to check.

Visual guide about How Does Kitchenaid Food Processor Work
Image source: jodysbakery.com
Problem: The blade or disc isn’t spinning.
Solution: First, ensure the appliance is unplugged. Then, verify that the blade or disc is properly seated on the drive shaft or adapter. If it’s loose or misaligned, it won’t engage with the motor’s power. Check for any obstructions in the work bowl or around the drive shaft that might be preventing rotation. If the food processor blade not spinning persists after checking these points, consult your user manual or Kitchenaid customer support.
Problem: Ingredients are unevenly processed.
Solution: This often happens due to overloading the work bowl or adding ingredients of vastly different sizes. Try processing smaller batches. For chopping, use the pulse function in short bursts, allowing ingredients to settle between pulses. For slicing/shredding, ensure ingredients fit the feed tube without forcing and apply even pressure with the pusher. Some ingredients simply process better alone or in smaller quantities.
Problem: The motor seems to be struggling or smells hot.
Solution: Stop the Kitchenaid food processor immediately. You might be processing a batch that’s too large or ingredients that are too hard for the current setting. Reduce the load or cut ingredients into smaller pieces. Allowing the motor to cool down is crucial. Running it for extended periods with tough ingredients can lead to overheating. Always let the motor rest if it feels excessively warm or emits a burning smell. Refer to your manual for recommended continuous run times and cool-down periods.
Conclusion: The Heart of a Modern Kitchen
The Kitchenaid food processor is a testament to thoughtful engineering, blending powerful mechanics with user-friendly design. Understanding how this indispensable appliance works empowers you to tackle a vast array of culinary tasks with confidence and precision. From the robust motor nestled in its stable base to the versatile collection of blades and discs, each component plays a vital role in transforming raw ingredients into delicious meals.
By following the simple steps for assembly, operating it safely, and employing the practical tips outlined in this guide, you’ll not only extend the life of your Kitchenaid food processor but also elevate your cooking game. Embrace the efficiency, speed, and consistent results that a properly understood and utilized Kitchenaid food processor brings to your kitchen. Happy cooking!