
A manual food processor is a fantastic kitchen tool that lets you prep ingredients without electricity. It’s portable, easy to clean, and perfect for quick tasks like chopping vegetables or making salsa. This guide will walk you through everything, from assembly and loading to processing your food perfectly. You’ll learn how to get the most out of your manual food processor for all your cooking needs.
Welcome to the wonderful world of manual food processors! If you’re looking for a simple, efficient, and electricity-free way to tackle your chopping, mincing, and pureeing needs, you’ve come to the right place. A manual food processor is a compact and versatile kitchen gadget that can save you time and effort, whether you’re camping, living in a small space, or simply prefer a hands-on approach.
This comprehensive guide will teach you exactly how to use a manual food processor, from unpacking it to cleaning up. We’ll cover everything you need to know to chop vegetables, create delicious salsas, and prepare a variety of ingredients with ease. Get ready to transform your cooking experience with this handy tool!
Key Takeaways
- Understanding Your Manual Food Processor: Familiarize yourself with its simple components – a bowl, blade, lid, and a manual mechanism (pull cord or crank).
- Prioritize Safety and Cleanliness: Always wash all parts before first use and after each use. Handle blades with extreme caution as they are very sharp.
- Proper Assembly is Crucial: Ensure the blade is securely seated on the central post and the lid locks correctly onto the bowl for safe and effective operation.
- Prepare Ingredients Thoughtfully: Cut larger food items into smaller, manageable pieces (1-2 inches) before placing them in the bowl to prevent overloading and ensure even processing.
- Master the Processing Technique: Use short, controlled pulls or cranks for chopping, checking consistency frequently to avoid over-processing.
- Don’t Overfill the Bowl: Stick to the manufacturer’s maximum fill line (usually 1/2 to 2/3 full) to allow the blades enough room to work efficiently.
- Regular Cleaning and Storage: Disassemble all parts and wash them thoroughly after each use. Store your manual food processor safely to protect the blades and prevent damage.
Understanding Your Manual Food Processor
Before we dive into the “how-to,” let’s quickly understand what a manual food processor is and its basic parts. Unlike electric food processors that rely on a motor, manual versions operate through human power. They typically feature:
- A clear bowl: This holds your ingredients.
- Sharp blades: Usually S-shaped, designed for chopping, mincing, and blending.
- A lid with a mechanism: This is where the magic happens! It usually has a pull cord, a hand crank, or a plunger that, when operated, spins the blades.
- An anti-slip base: To keep it steady on your countertop.
These devices are fantastic for quick jobs, small batches, and when you want precise control over the texture of your food.
Step-by-Step Guide to Using Your Manual Food Processor
Step 1: Unpack and Clean Your Manual Food Processor
Before its first use, and after every subsequent use, hygiene is key.
Unbox and Identify Components
Carefully remove all parts from the packaging. You should have the bowl, the blade assembly, and the lid. Some models might come with additional attachments, like whisks or different blades – set those aside for now if you’re just focusing on chopping.
Wash All Parts Thoroughly
Wash the bowl, lid, and blade assembly in warm, soapy water. Use a brush for the blade to ensure safety and thorough cleaning. Be extremely careful when handling the blades; they are very sharp! Rinse well and let them air dry, or dry them immediately with a clean cloth. This removes any manufacturing residues and ensures your food processor is ready for safe use.
Step 2: Assemble Your Manual Food Processor
Proper assembly ensures safety and efficiency. If you need a more general guide on setting up, you can learn more about how to assemble a food processor step by step.
Place the Blade Assembly
Carefully take the blade assembly by its central plastic shaft. Lower it into the center of the bowl, ensuring the base of the blade unit sits snugly on the central post at the bottom of the bowl. Make sure it’s stable and doesn’t wobble excessively.
Secure the Lid
Place the lid onto the bowl. Most manual food processors have a locking mechanism, often involving aligning tabs on the lid with slots on the bowl and then twisting or pressing down until it clicks into place. This is crucial for safety and to prevent food from splattering out during operation. Double-check that it’s securely fastened.
Step 3: Prepare Your Ingredients
This step is vital for optimal results and preventing damage to your manual food processor.
Cut Food into Manageable Pieces
Manual food processors work best with smaller, uniform pieces. Don’t throw a whole onion or a large carrot directly into the bowl. Cut your ingredients into roughly 1-2 inch chunks. This allows the blades to grab and process the food more effectively, preventing them from getting jammed. For example, when you want to chop vegetables with a food processor, uniform pieces are always best.
Remove Hard Seeds or Pits
If you’re processing fruits or vegetables with hard seeds (like avocados or peaches) or tough cores, remove them first. These can dull or even damage the blades.
Don’t Overfill the Bowl
Most manual food processor bowls have a maximum fill line marked on them. Adhere to this! Overfilling is a common mistake that leads to uneven chopping, puts strain on the mechanism, and can even prevent the blades from spinning properly. A good rule of thumb is to fill it no more than 1/2 to 2/3 full. If you have a lot of ingredients, process them in batches.
Step 4: Process Your Food
Now for the fun part – actually processing your ingredients! The technique depends on whether your manual food processor has a pull cord or a hand crank.
For Pull-Cord Models
Place on a Stable Surface
Ensure your manual food processor is on a flat, stable, non-slip surface. Many models have rubber feet or a non-slip ring on the bottom. Hold the top of the lid firmly with one hand.
Pull the Cord
With your other hand, grasp the pull cord handle. Pull it horizontally and firmly away from the unit in a swift, smooth motion. You’ll feel the blades spin. Allow the cord to retract fully before pulling again.
Use a Pulsing Action
Instead of long, continuous pulls, use short, quick “pulses.” Pull the cord 2-3 times, then pause and check the consistency. This gives you greater control over the texture and helps prevent over-processing your ingredients into a mush.
For Hand-Crank Models
Place on a Stable Surface
Like pull-cord models, ensure it’s on a stable surface. Hold the bowl or the lid firmly with one hand.
Turn the Crank
With your other hand, turn the hand crank clockwise (or as indicated by your model) in a consistent motion. The blades will spin inside the bowl.
Control the Speed and Duration
You have continuous control with a hand crank. Turn it slower for a coarser chop and faster for a finer chop. Again, pause frequently to check the consistency of your food.
Step 5: Check Consistency and Scrape Down Sides
Achieving the perfect texture requires a little vigilance.
Monitor Progress
The clear bowl is your friend! Watch your ingredients as they process. For a coarse chop, you’ll need fewer pulls or turns. For a finer mince or puree, you’ll need more.
Scrape Down the Sides (If Needed)
Sometimes, ingredients can stick to the sides of the bowl or the lid, especially if they are softer or wetter. If you notice this, carefully remove the lid, use a spatula to scrape down the sides, and then re-secure the lid before continuing to process. This ensures even chopping.
Step 6: Remove Processed Food
Once you’ve reached your desired consistency, it’s time to get your delicious prepped ingredients out.
Carefully Remove the Lid
Unlock and lift the lid. Be mindful of any food clinging to the underside of the lid or the pull-cord/crank mechanism.
Remove the Blade Assembly
This is a critical step for safety. Gently grasp the central plastic shaft of the blade assembly and lift it straight out of the bowl. Place it immediately in a safe spot, or carefully rinse it off, being wary of the sharp edges. Never try to scrape food out of the bowl with the blade still in place.
Empty the Bowl
Now you can safely scrape the processed food from the bowl into your cooking pot, serving dish, or storage container using a spatula.
Step 7: Clean Your Manual Food Processor Again
Immediate cleaning prevents food from drying and sticking, making the job much easier.
Disassemble All Parts
Separate the bowl, lid, and blade assembly completely.
Wash Thoroughly
Wash all components in warm, soapy water. Pay special attention to the nooks and crannies of the lid and around the blade assembly. A small brush can be helpful. Rinse all parts thoroughly. Most manual food processor parts are top-rack dishwasher safe, but always check your product manual to be sure.
Dry and Store
Ensure all parts are completely dry before reassembling or storing. This prevents odors, mildew, and rust, especially on the blades. Store your manual food processor in a cabinet, ensuring the blades are protected (some come with a blade cover).
Practical Tips for Using Your Manual Food Processor
- Don’t Force It: If the blades aren’t spinning easily, stop! You might have too much food, pieces that are too large, or a jammed ingredient. Clear it out and restart. Forcing it can break the mechanism.
- Pulse, Don’t Puree (Unless You Want To): For most chopping tasks, a pulsing action gives you more control and prevents you from turning your ingredients into a liquid paste.
- Add Liquids Gradually: If you’re making a dressing, sauce, or salsa, add liquids gradually through a small opening in the lid (if your model has one) or by pausing and adding them in small increments.
- Ideal for Small Batches: Manual food processors truly shine when you need to chop a single onion, a handful of herbs, or make a small batch of dressing or pesto. For larger tasks, you might consider an electric model or process in multiple batches.
- Versatility is Key: Beyond chopping vegetables, you can use your manual food processor for making breadcrumbs, mincing garlic and ginger, creating nut butters (small amounts), whipping cream (if it comes with a whisk attachment), or even making a quick shredded cheese with your food processor for tacos! You can even shred cabbage in your food processor for coleslaw or salads.
- Maintenance: Periodically check the pull cord or crank mechanism for wear and tear. Keep the blades sharp by not trying to process overly hard items like whole coffee beans or frozen foods.
Troubleshooting Common Manual Food Processor Issues
Even with simple manual devices, you might encounter a few hiccups. Here’s how to address them:
Blades Not Spinning or Getting Stuck
Cause: This is usually due to overloading, pieces of food being too large, or food jamming the blades.
Solution: Immediately stop, remove the lid, and carefully take out the blade assembly. Remove some of the food, cut larger pieces into smaller ones, and redistribute the ingredients evenly. Never force the mechanism if it’s resistant.
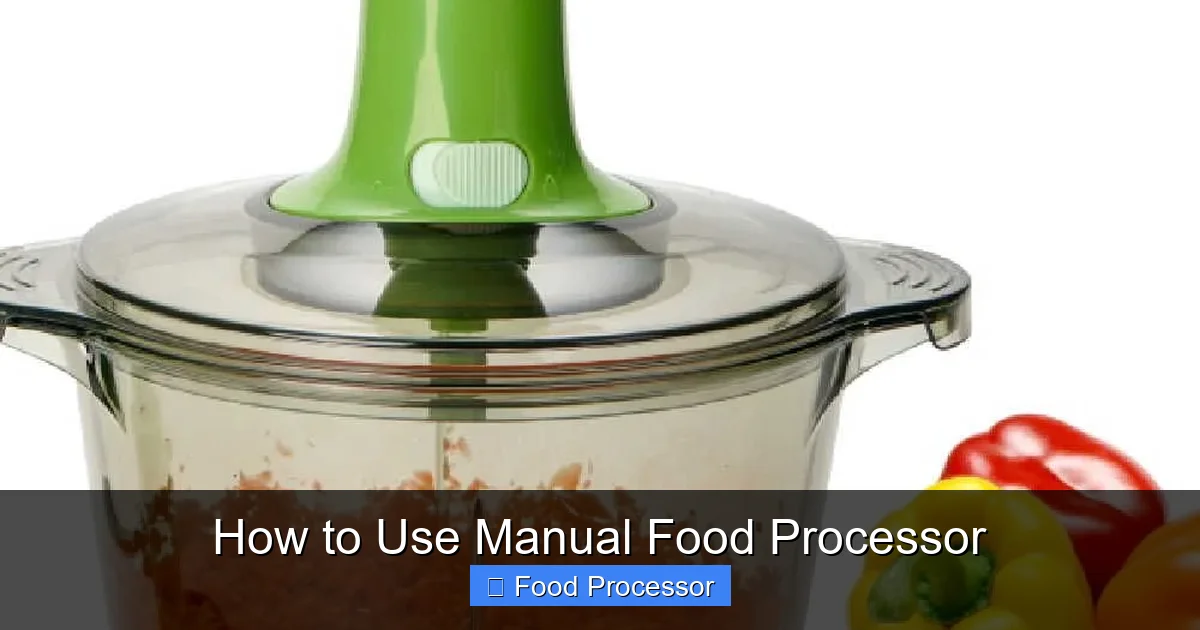
Visual guide about How to Use Manual Food Processor
Image source: catchyfinds.com
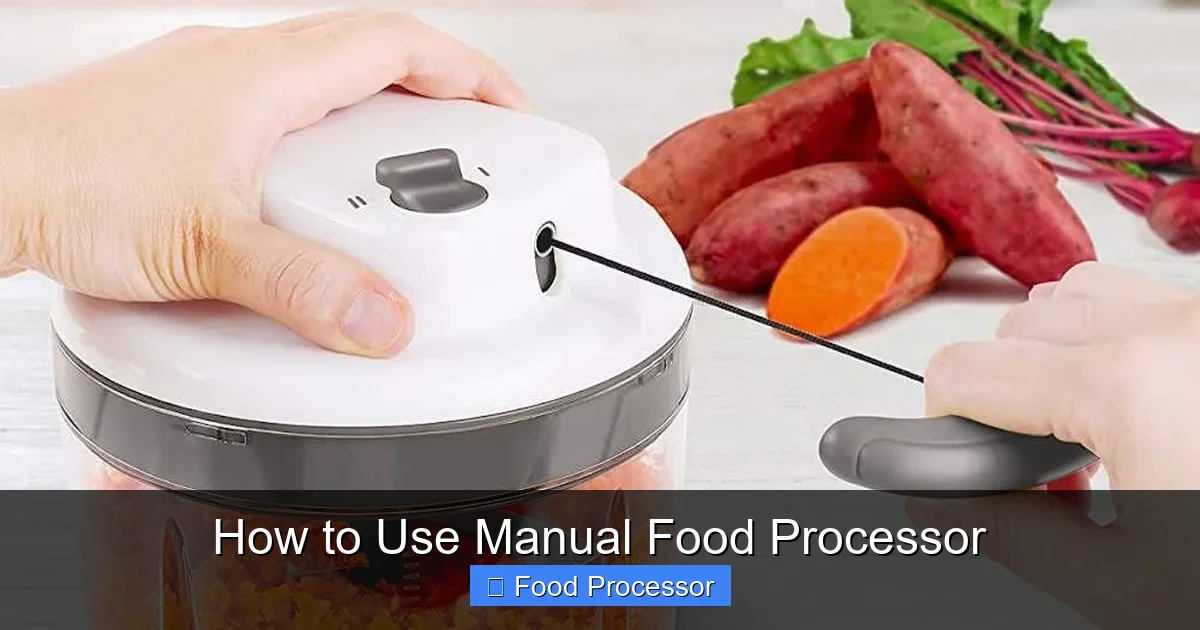
Visual guide about How to Use Manual Food Processor
Image source: catchyfinds.com
Unevenly Chopped Food
Cause: Ingredients are packed too tightly, pieces are too varied in size, or you’re not pausing to scrape down the sides.
Solution: Ensure you’re not overfilling the bowl. Cut all ingredients to a similar size before processing. Use a pulsing action and pause to scrape down the sides of the bowl with a spatula, ensuring all food gets processed evenly.
Food Sticking to the Lid or Sides
Cause: Wet or sticky ingredients naturally cling.
Solution: This is normal. Simply pause, remove the lid, and use a silicone spatula to scrape down any stuck food from the lid and the sides of the bowl back towards the blades. Re-secure the lid and continue processing.
Difficulty Pulling the Cord or Turning the Crank
Cause: Similar to blades getting stuck, this indicates too much resistance. It could be an overloaded bowl or a mechanical issue.
Solution: First, check the contents of the bowl as described above. If the bowl is not overloaded and you still feel excessive resistance, inspect the mechanism for any visible damage or debris that might be impeding its movement. If it’s a new unit, ensure all packaging materials are removed. If it’s an older unit, sometimes a drop of food-grade mineral oil on the moving parts (away from food contact areas) can help, but check your manual first.
Lid Won’t Securely Lock
Cause: Misalignment of the lid tabs and bowl slots, or food debris caught in the locking mechanism.
Solution: Check that there are no food particles obstructing the locking tabs. Ensure the lid is perfectly aligned with the bowl before attempting to twist or snap it into place. Sometimes, a gentle jiggle helps.
Conclusion
Using a manual food processor is a straightforward and rewarding experience. It empowers you to take control of your food preparation, offering precise results without the need for electricity. By following these steps – from careful assembly and ingredient preparation to proper processing techniques and thorough cleaning – you’ll quickly become a pro.
Whether you’re making a vibrant salsa, mincing garlic for a weeknight meal, or preparing a healthy salad dressing, your manual food processor will be a reliable ally in the kitchen. Embrace the simplicity and efficiency of this fantastic tool, and enjoy fresh, perfectly processed ingredients every time! Happy chopping!