
Learning how to properly arrange your food processor is crucial for both safety and optimal performance in the kitchen. This comprehensive guide walks you through each step, from identifying components to securely attaching blades and lids, ensuring your appliance is ready for any culinary task. Follow these instructions to master food processor assembly and prevent common issues, making your cooking experience smoother and more enjoyable.
How to Arrange Food Processor
A food processor is an invaluable kitchen tool, transforming tedious chopping, slicing, and shredding into quick, effortless tasks. But before you can whip up a batch of pesto or finely dice onions, you need to know how to arrange your food processor correctly. This isn’t just about getting it to work; it’s about ensuring safety, efficiency, and the longevity of your appliance. Improper assembly can lead to your machine not turning on, food not processing correctly, or even potential hazards.
This comprehensive guide will walk you through every step of how to arrange a food processor, from identifying its various parts to securely locking them into place. We’ll cover the nuances of different blade types and offer practical tips to make your food prep seamless. By the end of this article, you’ll be a pro at arranging your food processor, ready to tackle any recipe with confidence.
Key Takeaways
- Understand Your Components: Familiarize yourself with all parts – motor base, work bowl, lid, pusher, and various blades/discs – before starting assembly.
- Prioritize Safety: Always unplug the motor base before assembling or disassembling, handle sharp blades with extreme care, and ensure all parts are securely locked into place.
- Secure the Work Bowl First: The work bowl must be correctly aligned and locked onto the motor base before any blades or the lid are attached.
- Choose the Right Blade: Select the appropriate blade or disc for your specific task (e.g., S-blade for chopping, shredding disc for cheese) and insert it carefully onto the drive shaft.
- Lock the Lid Properly: The lid, with its safety interlock, must be correctly positioned and locked to allow the food processor to operate. Never force it.
- Don’t Overfill: Always adhere to the maximum fill lines on your work bowl to ensure efficient processing and prevent damage or spills.
- Clean Immediately: Disassemble and clean all removable parts promptly after use to prevent food from drying and making cleanup more difficult.
Step 1: Unpack and Identify Your Food Processor Components
Before you begin, it’s essential to understand what each part of your food processor does. Most food processors, regardless of brand, share common components. Lay out all the pieces on a clean, flat, and stable surface. This helps you confirm you have everything and makes the assembly process clearer.
Familiarize Yourself with the Key Parts
- Motor Base: This is the heaviest part. It contains the motor and controls. It’s the foundation of your food processor.
- Work Bowl: This clear bowl sits on top of the motor base. It’s where your ingredients are processed. It usually has a handle and a locking mechanism.
- Lid: This covers the work bowl and typically features a feed tube for adding ingredients. It also has a safety interlock that must be engaged for the processor to operate.
- Food Pusher (or Plunger): This fits inside the feed tube of the lid. It’s used to push food down towards the blades while the processor is running.
- S-Blade (or Chopping Blade): This is the most common blade. It’s a two-pronged blade used for chopping, mincing, pureeing, and mixing. It often looks like a curved “S.”
- Slicing/Shredding Discs: These flat, round discs usually have various blades or grates. They sit on top of the drive shaft, above the S-blade (which would be removed for these tasks). You might have different discs for fine slicing, thick slicing, fine shredding, and coarse shredding.
- Disc Stem (or Drive Adapter): This plastic shaft connects the motor to the slicing/shredding discs, allowing them to spin.
Knowing these parts is the first step in learning how to arrange a food processor effectively.
Step 2: Position the Motor Base Securely
Safety starts with a stable foundation. The motor base of your food processor should always be placed on a sturdy, level, and dry countertop. Ensure it’s away from the edge to prevent accidental falls, especially when the unit is operating and vibrating.
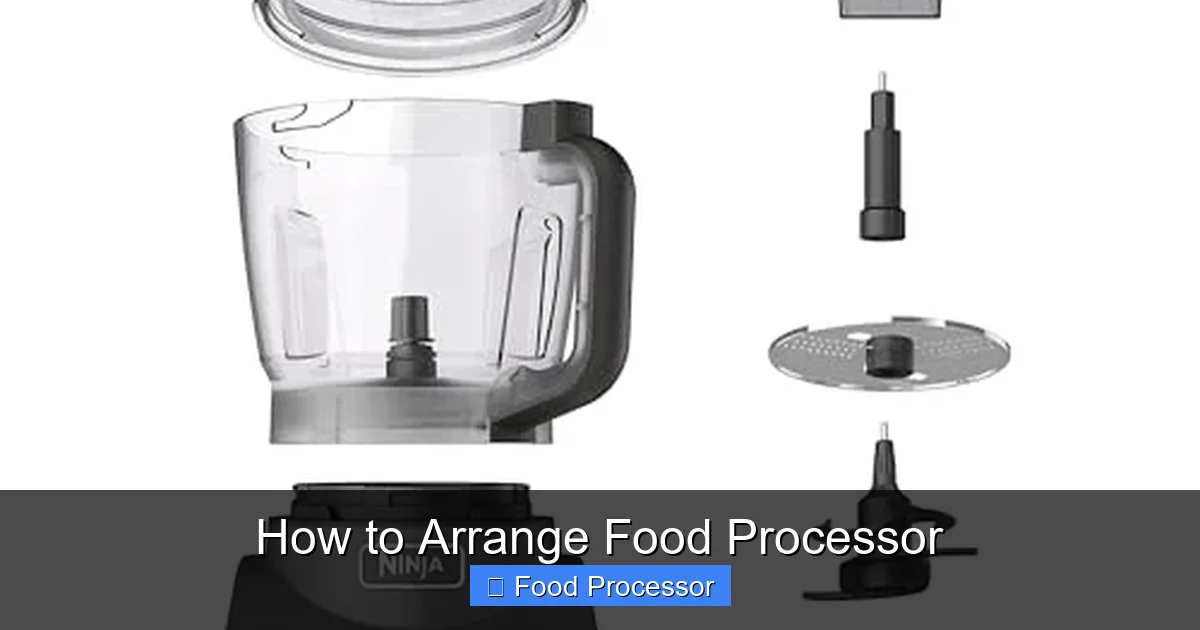
Visual guide about How to Arrange Food Processor
Image source: m.media-amazon.com
Ensure Stability and Power Safety
- Stable Surface: Place the heavy motor base on a non-slip surface if possible. This prevents it from moving during operation.
- Unplugged Status: Crucially, make sure the food processor’s power cord is unplugged from the wall outlet during the entire assembly and disassembly process. This eliminates any risk of accidental activation and injury.
Step 3: Secure the Work Bowl onto the Motor Base
The work bowl is the first component you’ll attach to the motor base. This step is critical because the food processor will not operate if the bowl isn’t properly locked in place.
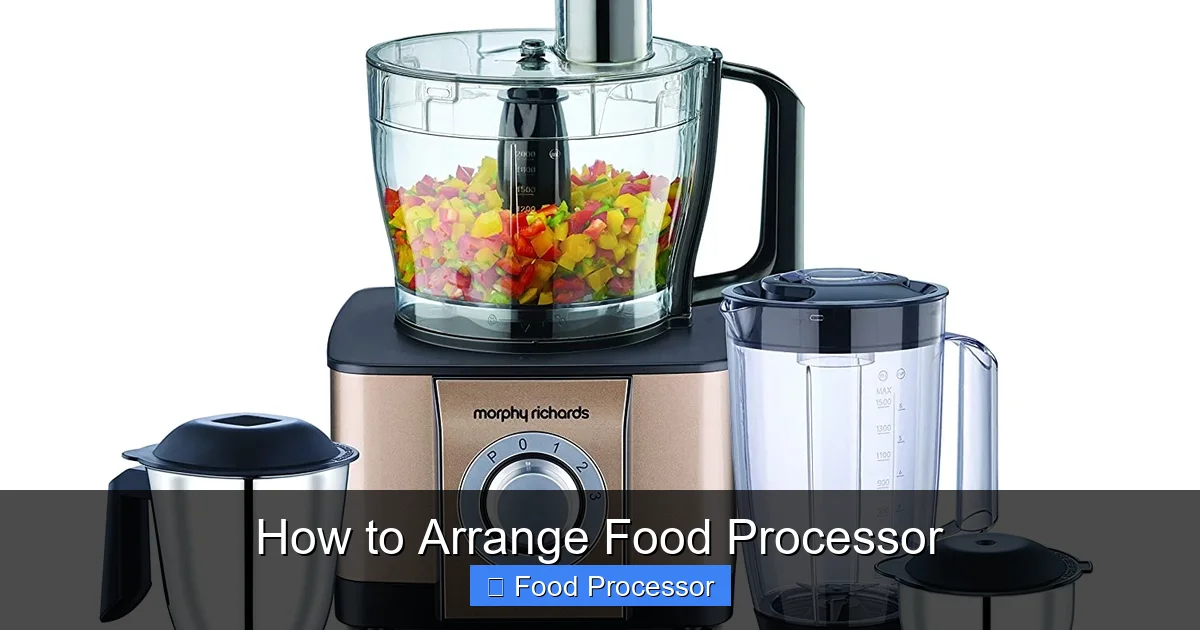
Visual guide about How to Arrange Food Processor
Image source: topranke.com
How to Attach the Work Bowl
- Align the Handle: Hold the work bowl by its handle. Most food processors have a specific alignment. You’ll usually need to align the handle of the work bowl with a specific marker or slot on the motor base. This often involves aligning the handle slightly to the left or right of the center front position.
- Lower and Twist: Once aligned, gently lower the work bowl onto the motor base. You’ll then need to twist the bowl (usually clockwise) until it clicks securely into place. You should feel it lock, and the handle will typically align with the front center of the base, or a marked “lock” position.
- Check for Firmness: Give the bowl a gentle tug. It should feel firm and not wobble. If it’s loose, repeat the alignment and twisting until it locks properly. This mechanism is a safety feature that prevents the machine from starting if the bowl is not correctly seated. If you’re struggling, refer to your specific model’s manual for detailed instructions on how to assemble your food processor step-by-step.
Step 4: Choose and Insert the Appropriate Blade or Disc
This is where your food processor’s versatility truly shines. Selecting the right blade or disc for your task is key to achieving the desired result. Always handle blades with extreme caution, as they are very sharp.
Inserting the S-Blade (Chopping Blade)
- Careful Handling: Pick up the S-blade by the plastic hub in the center, not the sharp edges.
- Position on Drive Shaft: Carefully lower the S-blade onto the drive shaft within the work bowl. It should slide down easily and sit firmly on the bottom of the shaft. Do not push down excessively hard.
- Ensure Stability: Give it a slight wiggle to ensure it’s properly seated and stable.
Inserting Slicing or Shredding Discs
If your recipe calls for slicing or shredding, you’ll use a disc instead of the S-blade. This is commonly needed when you want to shred cabbage for coleslaw or quickly shred cheese.
- Remove S-Blade: First, ensure the S-blade is removed from the work bowl if it was previously inserted.
- Place Disc Stem: Place the disc stem (drive adapter) onto the drive shaft in the work bowl. It should fit snugly.
- Position the Disc: Carefully lower the chosen slicing or shredding disc onto the disc stem. The disc typically has a hole in the center that fits over the stem. Ensure the cutting edge of the disc is facing upwards, ready to process food.
- Secure Fit: Check that the disc is level and stable. It should not wobble excessively.
Remember, always unplug the food processor before reaching into the bowl to change blades or clear food.
Step 5: Attach the Lid Securely
The lid is perhaps the most important safety component after the bowl itself. All modern food processors have a safety interlock system that prevents the motor from running unless the lid is correctly locked into place. This prevents injury from moving blades and keeps food contained.
How to Lock the Lid
- Align the Lid: Place the lid on top of the work bowl, aligning the feed tube with the handle of the work bowl, or following specific alignment markers on your model. Often, you’ll align the lid handle to one side of the work bowl handle.
- Twist to Lock: Gently press down and twist the lid (usually clockwise) until it clicks and locks into position. You’ll typically feel a definite click, and the lid handle or feed tube might align with the work bowl handle.
- Confirm Lock: Attempt to lift the lid without twisting. If it doesn’t come off, it’s properly locked. If it lifts, it’s not locked, and your food processor will not turn on. This is a common reason why a food processor might seem “broken” when it’s just a matter of proper arrangement.
Step 6: Insert the Food Pusher into the Feed Tube
The food pusher is used to guide ingredients through the feed tube and towards the spinning blades or discs. It’s also an important safety device, keeping your fingers away from the sharp parts.
Using the Food Pusher
- Place it in the Tube: Simply slide the food pusher into the feed tube on the lid. It should fit snugly but still be easy to remove and insert.
- Don’t Force It: Never use anything other than the designated food pusher to push food into the feed tube. Using your fingers or another utensil is extremely dangerous.
- Keep it Handy: Even if you’re not immediately adding food through the feed tube, it’s good practice to have the food pusher in place, especially if your model requires it for the final safety interlock.
Step 7: Connect to Power and Perform a Quick Test
Once all components are securely arranged, you can plug in your food processor. Before adding food, it’s a good idea to perform a quick test.
Test Your Arrangement
- Plug In: Insert the power cord into a grounded electrical outlet.
- Pulse Briefly: Press the “Pulse” or “On” button briefly. The motor should engage, and the blade or disc should spin.
- Check for Issues: If it doesn’t turn on, double-check that the work bowl and lid are properly locked. Refer to the troubleshooting section below if issues persist.
Congratulations! Your food processor is now correctly arranged and ready for action. You’re set to chop vegetables, make dough, or prepare purees with ease.
Practical Tips for Arranging and Using Your Food Processor
Beyond the basic steps, a few practical tips can enhance your experience and ensure you get the most out of your food processor.
Prepare Your Ingredients
- Pre-cut Food: Even with a powerful food processor, it’s best to cut larger ingredients into pieces that fit easily through the feed tube. This also ensures more even processing.
- Don’t Overfill: Always observe the maximum fill lines marked on your work bowl. Overfilling can lead to uneven processing, leakage, and strain on the motor.
Processing Techniques
- Pulse for Control: Use the “Pulse” function for most chopping and dicing tasks. Short bursts give you greater control over the consistency and prevent over-processing.
- Continuous for Smoothness: For pureeing, mixing dough, or making nut butters, the “On” or “Continuous” setting is more appropriate.
- Add Liquids Slowly: When making dressings, sauces, or batters, add liquids gradually through the feed tube while the processor is running.
Safety First, Always
- Unplug After Use: Always unplug the food processor immediately after you’re done processing and before disassembling or cleaning.
- Blade Handling: Handle blades only by their plastic hubs. Never grab them by the sharp edges.
- Never Reach In: Never put your hand or any utensil into the work bowl while the food processor is plugged in, even if it’s off.
Troubleshooting Common Arrangement Issues
Sometimes, even with the best intentions, your food processor might not cooperate. Here are a few common issues related to arrangement and how to fix them.
Food Processor Won’t Turn On
This is the most frequent issue and almost always related to improper assembly of your food processor.
- Check the Plug: Ensure the power cord is securely plugged into a working electrical outlet.
- Verify Work Bowl Lock: Double-check that the work bowl is fully twisted and locked onto the motor base. It needs to click into place.
- Confirm Lid Lock: Make sure the lid is properly seated and twisted until it clicks into its locked position. The safety interlock prevents operation if the lid isn’t secure.
- Pusher Placement (Some Models): For some models, the food pusher must also be inserted into the feed tube for the safety interlock to fully engage.
Blade Not Spinning or Processing Unevenly
If you’re facing a situation where your food processor blade not spinning, it’s usually an assembly or loading issue.
- Incorrect Blade Insertion: Ensure the S-blade is fully seated on the drive shaft, or that the disc stem and disc are correctly positioned.
- Overloading the Bowl: Too much food can prevent the blade from spinning freely. Remove some ingredients and process in smaller batches.
- Food Jam: Sometimes a large, hard piece of food can jam the blade. Unplug the unit, carefully remove the food, and try again.
- Wrong Blade for Task: Make sure you’re using the correct blade for the food type. For instance, an S-blade won’t shred effectively.
Conclusion
Mastering how to arrange your food processor is a fundamental skill for anyone looking to maximize this appliance’s potential in their kitchen. By carefully following these step-by-step instructions—from identifying components and securing the work bowl to properly inserting blades and locking the lid—you ensure both your safety and the efficiency of your cooking tasks.
A properly assembled food processor not only functions flawlessly but also contributes to a more enjoyable and stress-free cooking experience. Remember to always prioritize safety by keeping the unit unplugged during assembly and disassembly, and by handling sharp blades with care. With practice, arranging your food processor will become second nature, allowing you to quickly and easily tackle a wide array of culinary preparations, saving you valuable time and effort in the kitchen.