

Wondering, “can you use a food processor as juicer”? The answer is yes, but with some extra effort. While a food processor can’t extract pure juice like a dedicated juicer, it excels at creating a pulp that, when strained, yields a good amount of liquid. This guide will walk you through the process, helping you make delicious, albeit thicker, juices or smoothies using your trusty food processor. It’s a great hack for fresh drinks without needing another appliance.
Can You Use Food Processor as Juicer?
Have you ever found yourself craving a fresh, homemade glass of juice but realized you don’t have a juicer? It’s a common kitchen dilemma! Many people wonder if their versatile food processor can step up to the challenge. The good news is, while a food processor isn’t designed specifically for juicing, you absolutely *can* use it to extract liquid from fruits and vegetables. It requires a few extra steps, but it’s a perfectly viable way to enjoy fresh juice without buying another appliance.
This comprehensive guide will show you exactly how to use a food processor as a juicer. We’ll cover everything from preparing your produce to straining the liquid and even offer tips for maximizing your yield. By the end, you’ll be a pro at turning your food processor into a makeshift juice extractor, ready to create healthy and delicious drinks.
Understanding the Difference: Food Processor vs. Juicer
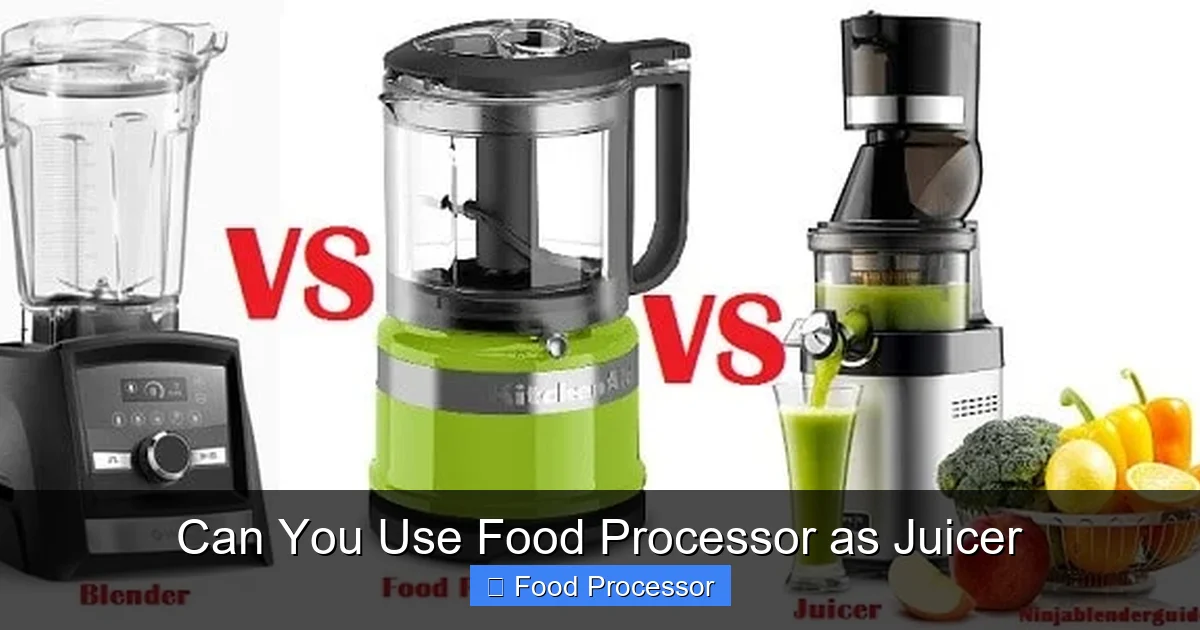
Before we dive into the “how-to,” it’s important to understand the fundamental difference between a food processor and a juicer. A dedicated juicer, whether centrifugal or masticating, is specifically engineered to separate the liquid from the fibrous pulp of fruits and vegetables. It extracts a clear, pulp-free juice.
A food processor, on the other hand, is built for chopping, slicing, grating, and pureeing. When you put produce into a food processor, it breaks it down into very small pieces, creating a thick puree or pulp. It doesn’t inherently separate the liquid. This means that if you want “juice” from a food processor, you’ll need to manually separate the liquid from the solids yourself. For a more detailed look at these differences, you might find our article on the difference between food processor and juicer very helpful.
Despite this difference, a food processor can still be a fantastic alternative, especially if you enjoy a slightly thicker, more fiber-rich drink, or if you simply don’t have space or budget for a dedicated juicer.
Key Takeaways
- Food Processors are not Juicers: A food processor blends and chops, producing a pulp. It won’t separate pulp from juice automatically like a dedicated juicer.
- Straining is Essential: To get juice from a food processor, you’ll always need an extra step of straining the processed pulp through a fine-mesh sieve, cheesecloth, or nut milk bag.
- Results Vary: The “juice” produced will likely be thicker and contain more fiber than juice from a conventional juicer. It might resemble a thin smoothie.
- Best for Soft Fruits & Leafy Greens: Softer fruits (like berries, citrus) and leafy greens (spinach, kale) yield better results. Harder vegetables (carrots, beets) require more effort and yield less liquid.
- Preparation is Key: Always wash and chop your produce into small, uniform pieces before processing to ensure efficient blending and easier straining.
- Pulp Has Uses: Don’t discard the leftover pulp! It’s full of fiber and nutrients, perfect for adding to soups, baked goods, compost, or even as a base for veggie burgers.
- Consider a Blender for Smoothies: If a thicker, fiber-rich drink is your goal, a blender might be a more direct tool to achieve a smoothie-like consistency without the straining step.
Step-by-Step Guide: Making Juice with Your Food Processor
Making juice with your food processor is a two-part process: first, you process the produce into a pulp, and then you strain the liquid from that pulp. Let’s break it down.
Step 1: Gather Your Equipment and Ingredients
Before you begin, make sure you have everything you need. This will make the process smooth and efficient.
What You’ll Need:
- Food Processor: Any standard food processor with a sharp S-blade will work.
- Sharp Knife and Cutting Board: For preparing your produce.
- Straining Device: This is crucial. Choose one of the following:
- Fine-mesh sieve (also known as a chinoise or strainer)
- Cheesecloth (multiple layers work best)
- Nut milk bag (often the most efficient for maximizing yield)
- Clean kitchen towel (thin, lint-free)
- Large Bowl or Pitcher: To collect the juice.
- Spatula or Spoon: For pressing the pulp.
- Your Chosen Fruits and Vegetables: Think about what kind of juice you want to make.
Step 2: Prepare Your Fruits and Vegetables
Proper preparation is key to getting the best results and protecting your food processor. This step is similar to how you would prepare ingredients for other tasks, like learning how to use a food processor step by step for general cooking.
Wash Thoroughly
Always wash your produce under cold running water. Remove any dirt, pesticides, or wax. For items like apples or cucumbers, you can scrub the skin with a produce brush.
Peel if Necessary
Some fruits and vegetables have skins that are too tough, bitter, or contain unwanted compounds. Consider peeling:
- Citrus fruits (oranges, lemons, grapefruit)
- Pineapple
- Melons
- Kiwi
- Ginger (if using)
- Certain root vegetables like beets (though many prefer to leave the skin for nutrients if organic and well-scrubbed)
For most other produce like apples, cucumbers, carrots, and leafy greens, leaving the skin on is fine and adds extra nutrients.
Chop into Small, Uniform Pieces
This is a critical step for your food processor. Larger pieces can stress the motor, lead to uneven processing, and make it harder to extract juice. Cut your fruits and vegetables into pieces no larger than 1-2 inches (2.5-5 cm). Aim for roughly uniform sizes so they process evenly.
- Harder produce (carrots, apples, celery): Cut into smaller chunks.
- Leafy greens (kale, spinach): Tear or chop into smaller segments.
- Softer fruits (berries, tomatoes): Can be roughly chopped.
Step 3: Process the Produce in Your Food Processor
Now it’s time to turn your solid produce into a juicy pulp!
Assemble Your Food Processor
Ensure your food processor is correctly assembled with the S-blade (also known as the multi-purpose blade) in place. Make sure the lid is securely locked.
Add Produce in Batches
Do not overload your food processor. Fill the work bowl about halfway to two-thirds full, depending on the size of your machine. Overfilling can lead to uneven processing and strain the motor. If you have a lot of produce, work in batches.
Pulse, Then Process
Start by using the “pulse” function a few times. This helps to break down larger pieces without immediately turning everything into liquid. Once the produce is roughly chopped, switch to the “high” setting (or continuous “on”) and process until you have a very fine, smooth puree or pulp. It should have a slightly wet consistency, but won’t be liquid yet.
- Processing Time: This varies depending on the produce and your food processor. It could be anywhere from 30 seconds to 2 minutes. Keep an eye on the consistency.
- Adding Liquid (Optional): For very dry or fibrous produce, you can add a tiny splash of water (1-2 tablespoons) to help the blades move more freely and achieve a smoother pulp. Be careful not to add too much, or you’ll dilute your juice.
Step 4: Strain the Juice from the Pulp
This is where the magic happens and you transform the pulp into actual juice. This step requires patience.
Set Up Your Straining Station
Place your chosen straining device (sieve, cheesecloth-lined sieve, or nut milk bag) over a large bowl or pitcher. Ensure the bowl is stable and large enough to hold all the juice you expect to extract.
Transfer the Pulp
Carefully spoon or pour the processed pulp from the food processor into your straining device. Do this in batches if you have a large amount of pulp, especially if using cheesecloth or a nut milk bag, to avoid overflow.
Extract the Juice
- Using a Sieve: Use the back of a spoon or a spatula to press down firmly on the pulp against the mesh. This forces the liquid through the holes, leaving the pulp behind. Scrape the bottom of the sieve occasionally to clear any clogged mesh.
- Using Cheesecloth or Nut Milk Bag: Gather the edges of the cheesecloth or the opening of the nut milk bag, forming a tight pouch around the pulp. Hold it over your bowl and squeeze firmly with both hands. Wring and twist the bag to extract as much liquid as possible. This method typically yields the most juice.
Continue pressing or squeezing until no more liquid drips out, or until you’ve reached your desired amount of juice. This can take several minutes per batch.
Step 5: Serve and Enjoy Your Homemade Juice
Once you’ve strained all the liquid, your homemade food processor juice is ready!
- Taste Test: Give your juice a taste. If it’s too tart, you can add a natural sweetener like a touch of maple syrup, honey, or a few drops of stevia. For a thinner consistency, you can add a little water, but remember this will dilute the flavor.
- Serve Immediately: Fresh juice is best consumed right away to get the maximum nutrients.
- Store: If you have leftovers, store them in an airtight container in the refrigerator for up to 24-48 hours. The quality and nutrient content will diminish over time.
Tips for Maximizing Your Juice Yield and Quality
Visual guide about Can You Use Food Processor as Juicer
Image source: ninjablenderguide.com
Getting the most out of your food processor juicing takes a little finesse.
- Choose the Right Produce:
- High Water Content: Cucumbers, celery, watermelon, oranges, tomatoes, and berries are excellent choices as they naturally contain a lot of liquid.
- Leafy Greens: Spinach, kale, and collard greens work well, especially when processed with high-water fruits.
- Avoid Very Dry or Starchy: Bananas (better for smoothies), avocados, and very starchy vegetables won’t yield much juice.
- Process in Small Batches: Don’t overload the food processor. Smaller batches ensure a finer, more uniform pulp, which makes straining easier and more effective.
- Pulp Texture Matters: Aim for a very fine, almost liquidy pulp in the food processor. The finer the pulp, the easier it is to separate the liquid.
- Press Firmly and Repeatedly: When straining, don’t be shy. Apply strong, continuous pressure to the pulp. If using cheesecloth or a nut milk bag, twist and wring until your hands ache a little – that’s how you get every last drop!
- Add a Little Water to Dry Pulp: If you’re struggling to get liquid from a particularly dry pulp, you can return the pulp to the food processor with a tablespoon or two of water and process again, then re-strain. This can sometimes help liberate more juice, though it will dilute it slightly.
- Consider a Blender for Smoother Results: If you’re less concerned about a clear, pulp-free juice and more about a nutritious drink, consider using a blender instead for a full-on smoothie. A food processor can definitely handle the initial chopping, but can a food processor be used as a blender for drinks like this? Yes, it can often create a very thick smoothie consistency without the need for straining.
Troubleshooting Common Issues
Visual guide about Can You Use Food Processor as Juicer
Image source: static.jazp.com
Even with the right steps, you might run into a few snags. Here’s how to troubleshoot them.
“My Food Processor Isn’t Producing Enough Liquid!”
- Are Your Ingredients High in Water? Re-evaluate your produce choices. If you’re trying to juice bananas or avocados, you’re not going to get much liquid.
- Is the Pulp Fine Enough? Process longer. The finer the pulp, the easier the liquid separates.
- Are You Straining Effectively? Press harder and longer. A nut milk bag is often superior for maximum extraction compared to a basic sieve.
“My Juice Is Too Pulpy/Thick!”
- Use a Finer Straining Method: If using a coarse sieve, switch to a finer one, or add layers of cheesecloth. A nut milk bag is specifically designed for fine straining.
- Re-Strain: If your first pass leaves too much pulp, strain the juice again through a clean straining device.
- Embrace the Fiber: Remember, food processor juice will naturally be thicker than traditional juicer juice. It’s more like a “whole juice” or a thin smoothie, retaining more fiber, which is great for digestion!
“My Food Processor Seems to Be Struggling”
- Don’t Overload: Always process in batches. Too much produce puts a heavy load on the motor.
- Chop Smaller: Ensure your produce is cut into small, manageable pieces before adding it to the work bowl.
- Check for Blockages: Sometimes a large piece gets stuck. Turn off, unplug, and carefully clear any obstructions.
Cleaning Up Your Food Processor After Juicing
After all that hard work, don’t forget to clean your food processor promptly. Bits of fruit and vegetable can dry and become difficult to remove. Most food processor parts are dishwasher safe, but always check your manufacturer’s instructions. Our guide on can you put food processor parts in the dishwasher provides excellent cleaning tips.
Don’t Waste the Pulp!
One fantastic advantage of using a food processor for juicing is the leftover pulp. It’s packed with fiber, vitamins, and minerals. Instead of throwing it away, consider these creative uses:
- Add to Baked Goods: Mix fruit pulp into muffins, breads, or cakes for added moisture and nutrients.
- Make Veggie Burgers: Vegetable pulp can be an excellent base for homemade veggie burgers.
- Soups and Sauces: Stir vegetable pulp into soups, stews, or pasta sauces for extra body and flavor.
- Compost: If you truly can’t use it, it’s excellent for your garden compost bin.
Conclusion
So, can you use a food processor as juicer? Absolutely, yes! While it’s not a direct replacement for a dedicated juicer, your food processor is a powerful and versatile tool that can help you create fresh, homemade juices with just a little extra effort. By carefully preparing your produce, processing it into a fine pulp, and then effectively straining the liquid, you can enjoy delicious and nutritious beverages.
This method is perfect for those who want to experiment with juicing without investing in another kitchen appliance. You’ll get a fiber-rich drink that’s a fantastic alternative to store-bought options. So go ahead, dust off that food processor, grab some fresh produce, and start juicing! Enjoy the satisfaction of creating healthy drinks right in your own kitchen.
