

Shredding cheese with a food processor is a game-changer, transforming a tedious kitchen chore into a quick and easy task. This guide will walk you through everything from preparing your cheese to safely operating your machine, ensuring you get perfectly shredded cheese for all your culinary needs. Say goodbye to tired arms and hello to effortless grating with your trusty food processor!
Welcome to the wonderful world of effortless cheese shredding! If you’ve ever spent what felt like an eternity grating a block of cheese by hand, you know the struggle – tired arms, scraped knuckles, and uneven results. But what if there was a better way? Enter the humble food processor, your culinary superhero for tackling this common kitchen task.
Using a food processor to shred cheese is not only faster but also yields beautifully consistent results, perfect for pizzas, tacos, casseroles, or just a mountain of cheesy goodness. This comprehensive guide will walk you through every step, from preparing your cheese to safely operating and cleaning your machine. We’ll cover practical tips, troubleshoot common issues, and ensure you become a master of the cheese shred. Let’s dive in and unlock the full potential of your food processor!
Key Takeaways
- Chill Your Cheese: Always chill your block of cheese for at least 30 minutes before shredding. Colder cheese is firmer and less likely to clump or smear, leading to better, more distinct shreds.
- Use the Right Blade: For shredding, you’ll need the shredding disc (also known as the grating disc) inserted into your food processor. Ensure it’s placed correctly for your model, usually with the sharp side facing up.
- Cut Cheese into Manageable Pieces: Before feeding, cut your cheese block into pieces that fit comfortably into the food processor’s feed chute without forcing them. This prevents jams and ensures even shredding.
- Apply Gentle, Even Pressure: When pushing the cheese through the feed chute, use the food pusher with light, consistent pressure. Too much force can strain the motor and result in mushy cheese, while too little can lead to uneven shreds.
- Safety First: Never use your hands or fingers to push cheese into the feed chute. Always use the provided food pusher to keep your hands safe from the rapidly spinning blade.
- Optimal Batch Size: Avoid overfilling the work bowl. Shred cheese in batches if you have a large quantity, allowing space for the shredded cheese and preventing the motor from overheating.
- Clean Promptly: Cheese can be sticky! Clean your food processor parts, especially the shredding disc, immediately after use to prevent cheese from hardening and making cleanup more difficult.
The Benefits of Food Processor Cheese Shredding
Before we get to the how-to, let’s briefly touch on why a food processor is your best friend for shredding cheese:
- Speed: What takes minutes by hand can be done in mere seconds with a food processor.
- Consistency: The machine produces uniform shreds, which melt evenly and look more appealing.
- Less Effort: Say goodbye to arm fatigue and the risk of grating your knuckles.
- Quantity: Easily shred large batches of cheese, saving time for meal prep or entertaining.
- Cost-Effective: Buying blocks of cheese and shredding them yourself is often cheaper than buying pre-shredded cheese, which also often contains anti-caking agents.
Ready to make your kitchen life easier? Let’s get started!
Step 1: Gather Your Supplies
Preparation is key to a smooth and successful cheese-shredding experience. Make sure you have everything you need within arm’s reach.
Your Food Processor
Of course, you’ll need your trusty food processor. Ensure it’s clean and in good working order. If you’re new to the world of food processors or need a refresher, you might want to learn how do you use a food processor step-by-step for general operation. Check out your machine’s manual if you’re unsure about specific parts or settings. If you’re looking for a new machine, consider checking out the best food processor for shredding cheese smoothly to ensure optimal results.
The Right Blade: Your Shredding Disc
Food processors come with various attachments. For shredding cheese, you’ll need the specific shredding disc (sometimes called a grating disc). It typically looks like a flat, round metal plate with raised holes or sharp blades. Most models offer a reversible disc with different sizes of shredding (fine vs. coarse), or separate discs for each. Choose the size that best suits your needs – coarse for tacos, fine for a delicate topping.
Your Cheese
This is the star of the show! Whether it’s cheddar, mozzarella, Swiss, or parmesan, your food processor can handle a variety of cheeses. Aim for block cheese rather than pre-cut slices or crumbles.
A Bowl for Your Shredded Cheese
Have a clean bowl ready to catch the freshly shredded cheese as it exits the food processor’s chute.
Step 2: Prepare Your Cheese
The way you prepare your cheese significantly impacts the quality of your shreds. Don’t skip these crucial steps!
Chill Your Cheese for Optimal Results
This is arguably the most important tip. Warm cheese is soft, sticky, and prone to clumping, smearing, and creating a messy paste in your food processor.
For best results:
- Place your block of cheese in the freezer for about 15-30 minutes before you plan to shred it.
- Alternatively, ensure it’s been well-chilled in the refrigerator for at least an hour.
- The goal is for the cheese to be very firm, but not frozen solid. This firmness allows the blades to create distinct shreds without turning it into a gummy mess.
Visual guide about How to Use Food Processor to Shred Cheese
Image source: recipes.net
Visual guide about How to Use Food Processor to Shred Cheese
Image source: recipes.net
Cut Cheese into Manageable Pieces
Before feeding the cheese into the food processor, you’ll need to cut it into pieces that fit easily into the feed chute.
How to cut:
- Measure the opening of your food processor’s feed chute.
- Cut your block of cheese into lengths or widths that are slightly smaller than the chute’s diameter. This ensures the cheese drops down freely without getting stuck or requiring excessive force.
- Aim for rectangular or square blocks that can stand upright or lay flat in the chute.
- Remove any wax rinds or hard edges that you wouldn’t want to eat.
Step 3: Assemble Your Food Processor
Safety and proper assembly are paramount. Ensure your food processor is set up correctly before you even think about plugging it in. If you’re unsure about the assembly process, you can find detailed instructions, sometimes even with video tutorials, on how to assemble food processor step by step.
Secure the Base
Place the food processor’s motor base on a stable, flat surface like your kitchen counter. Make sure it’s unplugged at this stage!
Attach the Work Bowl
Fit the work bowl onto the motor base. Most models require you to twist or lock it into place until you hear a click, indicating it’s securely fastened.
Insert the Shredding Disc
Carefully handle the disc:
- The shredding disc has sharp edges. Always handle it by its center hub or dull edges.
- Place the disc onto the central spindle inside the work bowl.
- Ensure it sits flush and is oriented correctly for shredding (usually with the grating side facing up). Refer to your manual if you have a reversible disc and are unsure which side to use.
Put on the Lid
Place the food processor lid onto the work bowl. Just like the bowl, you’ll typically need to twist and lock the lid into place. Many food processors have safety mechanisms that prevent the motor from starting if the lid isn’t properly secured.
Position the Food Pusher
Insert the food pusher into the feed chute opening of the lid. This is the tool you’ll use to push the cheese down towards the spinning disc. Do not plug the machine in yet!
Step 4: Shred Your Cheese!
Now for the exciting part! With everything assembled and your cheese ready, it’s time to unleash the power of your food processor.
Plug In Your Food Processor
Once everything is assembled and secure, plug the food processor into a grounded electrical outlet.
Place Your Catch Bowl
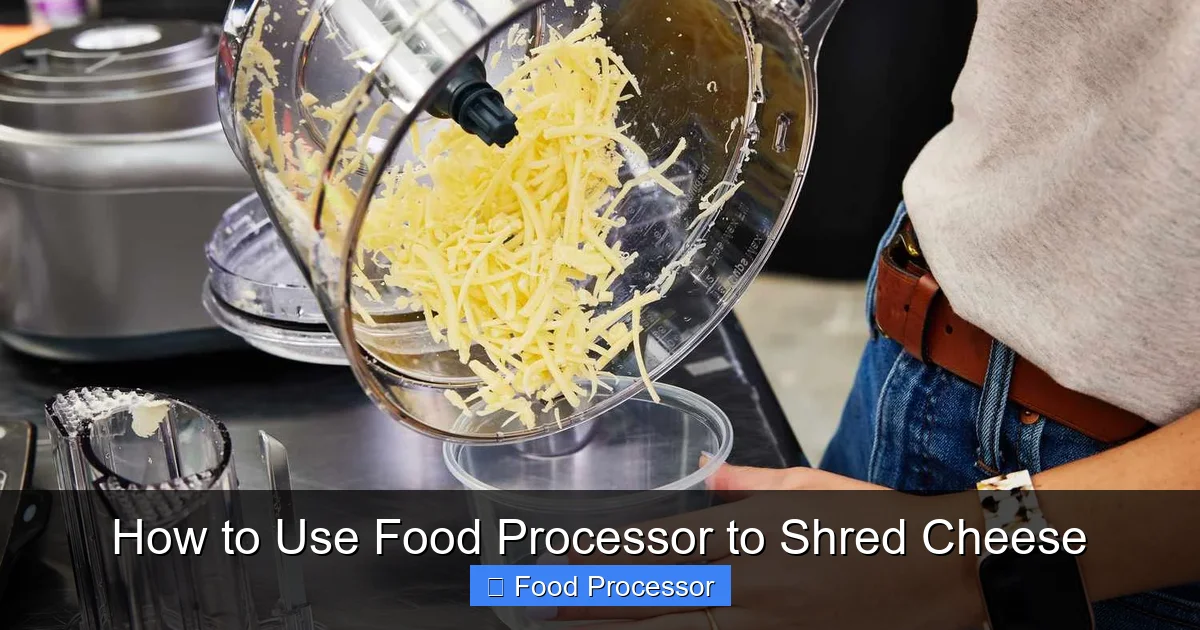
Position your ready bowl directly under the food processor’s output spout (the part where the shredded cheese will exit).
Turn On the Food Processor
Switch your food processor to the “On” setting. For shredding, a continuous speed is usually best. Avoid using the “Pulse” function for this task, as it can lead to uneven shredding and potentially overheat the motor if used incorrectly over time. Let the disc reach full speed before you start adding cheese.
Feed the Cheese Through the Chute
Technique matters here:
- Take one of your pre-cut cheese pieces.
- Carefully drop it into the feed chute.
- Place the food pusher on top of the cheese.
- Apply gentle, even pressure downwards. The goal is to guide the cheese, not force it. Let the spinning disc do the work.
- As the cheese gets shredded, it will fall into your waiting bowl.
- Continue adding cheese pieces one by one, maintaining steady pressure.
Avoid Overfilling the Work Bowl
As you shred, keep an eye on the work bowl underneath the disc. If a lot of shredded cheese builds up and presses against the underside of the disc, it can slow down the shredding process, create friction, and even strain your motor. Stop periodically, turn off the machine, carefully remove the lid and disc, and empty the shredded cheese if needed.
Step 5: Turn Off, Unplug, and Disassemble
Once all your cheese is beautifully shredded, it’s time to safely power down and clean up.
Turn Off and Unplug
Switch the food processor off immediately after you’re done shredding. Then, unplug it from the wall outlet. This is a critical safety step before you touch any parts.
Carefully Disassemble
Reverse the assembly steps:
- Remove the food pusher.
- Unlock and remove the lid.
- With extreme caution, grasp the shredding disc by its center hub and lift it straight up and out. Place it in the sink for cleaning. Remember, those blades are very sharp!
- Unlock and remove the work bowl from the motor base.
- Scrape out any remaining shredded cheese from the bowl using a spatula.
Step 6: Clean Up
Cleaning your food processor promptly prevents cheese residue from hardening and becoming a nightmare to remove.
Wash Parts Immediately
Wash the work bowl, lid, shredding disc, and food pusher with warm, soapy water. A bottle brush or a small cleaning brush can be very helpful for getting into crevices and safely cleaning the sharp disc. Most modern food processor parts are top-rack dishwasher safe, but always check your manual.
Wipe Down the Base
Wipe the motor base with a damp cloth to clean any spills or dust. Never submerge the motor base in water.
Practical Tips for Perfect Cheese Shredding
Want to get the most out of your food processor? Here are some additional tips for superior cheese shredding.
Experiment with Cheese Types
While most semi-hard to hard cheeses shred beautifully, some behave differently:
- Soft Cheeses (e.g., goat cheese, cream cheese): These generally do not shred well in a food processor. They tend to smear or become a paste.
- Semi-Hard Cheeses (e.g., cheddar, mozzarella, Monterey Jack): These are ideal. Ensure they are very cold for the best results.
- Hard Cheeses (e.g., Parmesan, Pecorino Romano): These shred wonderfully. You can even use the smaller grating disc for a finer, powder-like consistency, perfect for pasta.
Don’t Overfill the Feed Chute
While it’s tempting to cram as much cheese as possible into the chute, resist the urge. This can jam the machine, strain the motor, and lead to uneven or poorly shredded cheese. Feed pieces one at a time, ensuring they drop easily.
Pulse for Smaller Bits (Use Sparingly)
If you need very fine shreds or small crumbles from harder cheeses, you can sometimes achieve this by using the “Pulse” function in short bursts. However, for general shredding, continuous “On” is preferred. If pulsing, be very quick to avoid turning cheese into mush.
Storage of Shredded Cheese
Freshly shredded cheese tastes best and melts beautifully. Store any leftover shredded cheese in an airtight container or freezer bag in the refrigerator for up to 5-7 days. For longer storage, you can freeze it for several months. For best results, toss the shredded cheese with a tiny bit of cornstarch or tapioca starch before freezing to prevent clumping.
Troubleshooting Common Issues
Even with the best intentions, you might run into a snag or two. Here’s how to address them:
Issue: Cheese is Clumping or Smearing
This is the most common problem and almost always points to the cheese being too warm or too soft.
Solution:
- Remove the cheese from the food processor.
- Place the remaining cheese back into the freezer for another 15-30 minutes.
- Ensure your food processor parts are clean and free of sticky residue.
Issue: Machine Won’t Turn On
Solution:
- Check if the food processor is securely plugged into a working outlet.
- Ensure the work bowl and lid are correctly assembled and locked into place. Most food processors have safety interlocks that prevent them from operating if parts aren’t properly aligned.
- If you’ve checked these basic steps and it still won’t turn on, you might need to investigate further. For more in-depth solutions, you can consult articles like how to fix a food processor that is not turning on.
Issue: Shreds Are Uneven or Too Large/Small
Solution:
- Blade selection: Double-check that you’re using the correct shredding disc for the desired shred size. Some discs are reversible for different sizes.
- Cheese size: Make sure your cheese pieces are cut appropriately for the feed chute. If they are too small, they might tumble around; if too large, they might not engage the blade properly.
- Pressure: Adjust the pressure you apply with the food pusher. Too much force can sometimes crush the cheese instead of shredding it cleanly, while too little might let it bounce around.
Conclusion
Congratulations! You’ve just learned how to master the art of shredding cheese with your food processor. This simple technique will save you time, effort, and frustration in the kitchen, allowing you to enjoy fresh, perfectly shredded cheese for all your favorite dishes. Remember the key takeaways: chill your cheese, use the right disc, cut manageable pieces, and always prioritize safety.
With a little practice, you’ll be shredding cheese like a pro, wondering how you ever managed without your food processor. So go ahead, grab a block of your favorite cheese, and start shredding – your taste buds (and your arms!) will thank you. Now that you’re an expert at shredding cheese, why not explore other ways to get the most out of your food processor and truly elevate your cooking game? Happy shredding!
