

Making perfect pie dough can feel like a culinary challenge, but with the right tool, it becomes surprisingly simple. This guide reveals that the standard S-blade is the essential food processor attachment for pie dough, expertly cutting butter into flour and bringing the mixture together with minimal effort. You’ll learn how to use your food processor to create a consistently flaky and tender pie crust every time, along with practical tips and troubleshooting advice to ensure your baking success.
What Food Processor Attachment for Pie Dough
Ah, pie dough! The foundation of so many delicious desserts and savory treats. Achieving that perfect, flaky, tender crust can sometimes feel like a baker’s ultimate quest. For years, grandmothers and professional bakers alike swore by the “cold hands” method, meticulously cutting butter into flour with pastry blenders or fingertips. While these traditional methods certainly have their charm, they can also be time-consuming and a little messy.
Enter the humble food processor! This kitchen workhorse has revolutionized many cooking tasks, and making pie dough is high on that list. It takes the guesswork out of incorporating fat into flour, ensuring consistent results in a fraction of the time. But if you’re new to using your food processor for baking, you might be wondering: “What food processor attachment for pie dough do I actually need?”
Don’t worry, you’re in the right place! This guide will walk you through exactly which attachment to use, why it’s the best choice, and give you a step-by-step blueprint for creating the most glorious pie dough with minimal effort. You’ll learn the secrets to flaky, tender crusts and gain the confidence to whip up pies, tarts, and quiches like a pro.
Key Takeaways
- The S-Blade is Key: The standard metal S-blade (also known as the chopping or multipurpose blade) is the *only* food processor attachment you need for making perfect pie dough. It’s designed to efficiently cut cold butter into flour.
- Cold Ingredients are Crucial: Always use very cold butter and ice water. This prevents the butter from melting and ensures those essential pockets of steam that create a flaky crust.
- Pulse, Don’t Process Continuously: Short, quick pulses are vital. This technique prevents overworking the dough, which can lead to a tough crust, and helps you achieve the right crumbly texture before adding liquid.
- Avoid Overworking the Dough: The food processor speeds up the process, but it can also overwork the dough quickly. Stop processing as soon as the dough just comes together, often described as forming large clumps.
- Chill Time is Essential: After mixing, always chill your pie dough for at least 30 minutes (or longer). Chilling allows the gluten to relax and the butter to firm up, making the dough easier to roll and ensuring a tender, flaky baked crust.
- Dough Blade is Not for Pie Dough: While some food processors come with a plastic dough blade, it is generally too gentle for effectively cutting butter into flour for pie dough. Stick with the metal S-blade for best results.
Understanding Pie Dough Basics and Why a Food Processor Helps
Before we dive into attachments, let’s briefly touch on what makes a great pie dough. The magic lies in tiny pockets of butter (or other fat) encased in flour. As the pie bakes, the water in the butter turns to steam, creating air pockets that separate the layers of flour, resulting in that signature flaky texture. The key is to keep the butter cold and avoid overworking the gluten in the flour, which can lead to a tough crust.
Traditional methods rely on a lot of delicate handling to achieve this balance. A food processor, however, excels at this task because it:
- Keeps things cold: The speed of the blades means less time handling the dough with warm hands, keeping the butter cold and firm.
- Ensures consistency: It cuts the butter into uniform pieces quickly, leading to an even distribution throughout the flour.
- Prevents overworking: With careful pulsing, you can combine ingredients without developing too much gluten.
When it comes to preparing doughs, especially robust ones like pie crust, having the best food processor for thick dough recipes makes a significant difference in achieving consistent results.
The Essential Attachment: The S-Blade (Standard Blade)
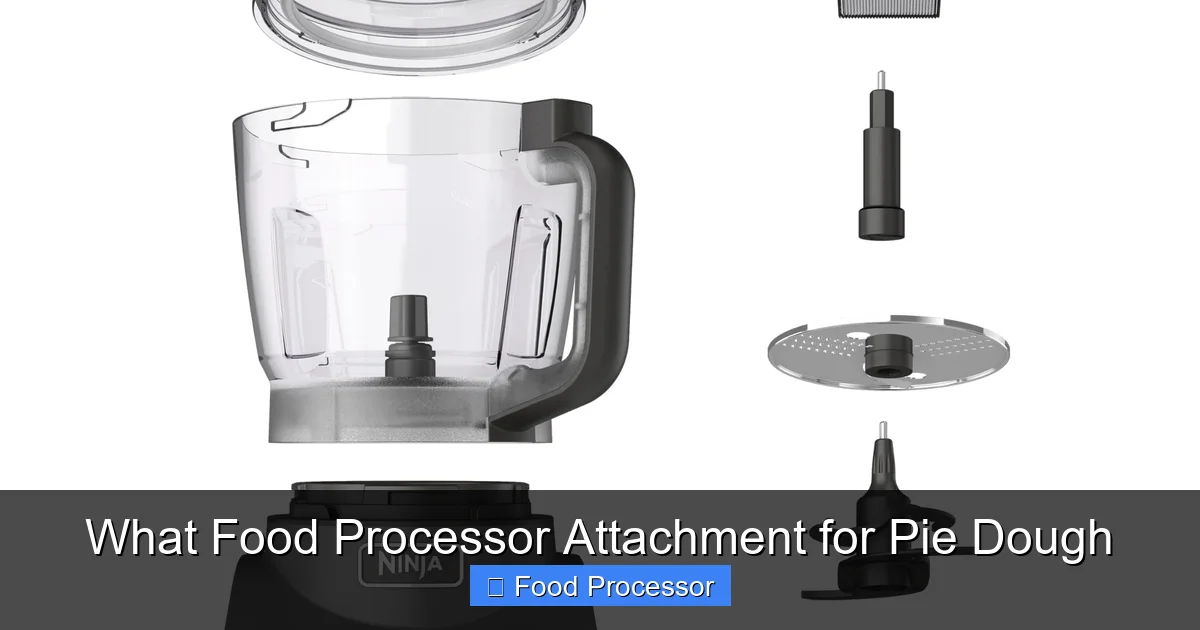
When you first unbox your food processor, you’ll likely find an array of blades and discs. For pie dough, the choice is simple and singular: you need the standard metal S-blade.
What is the S-Blade?
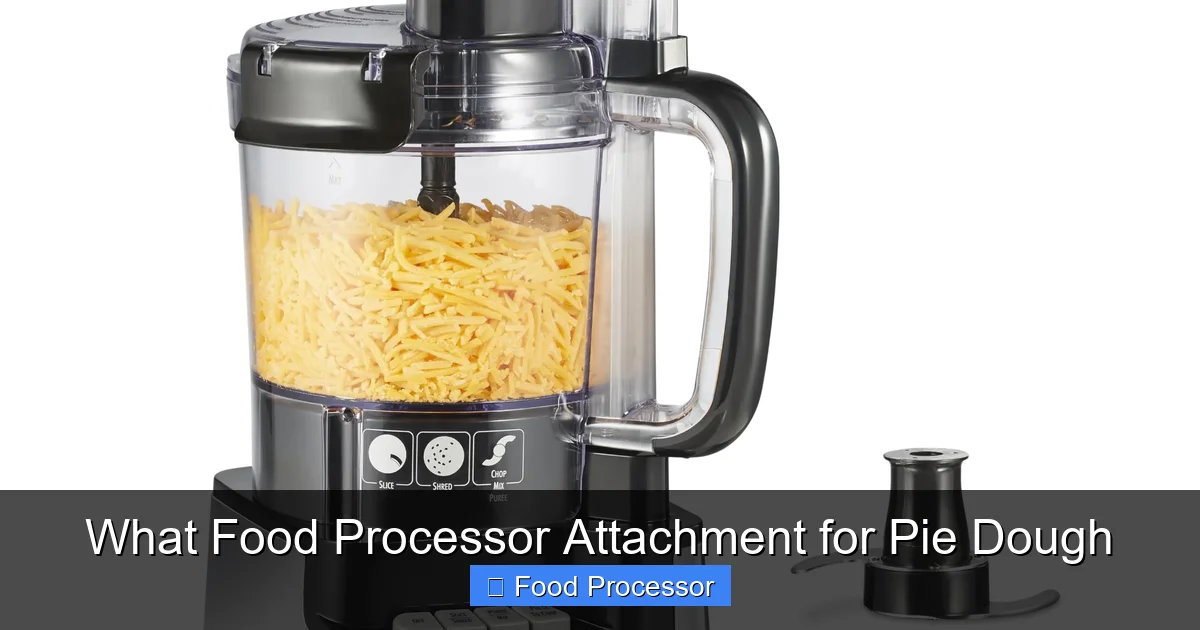
The S-blade is the most common and versatile attachment in your food processor. It’s a two-pronged metal blade that resembles an “S” shape, hence the name. It sits at the bottom of the food processor bowl and is designed for chopping, mixing, pureeing, and yes, cutting fats into flour.
Visual guide about What Food Processor Attachment for Pie Dough
Image source: m.media-amazon.com
Why the S-Blade is Perfect for Pie Dough
The S-blade’s sharp, robust design is ideal for pie dough because it:
- Cuts Butter Efficiently: Its sharp edges swiftly cut cold butter into small, pea-sized pieces without turning it into a paste. This is crucial for creating flakiness.
- Mixes Quickly: The speed of the S-blade allows it to combine the flour and butter rapidly, minimizing the time the butter has to warm up.
- Incorporates Liquid Evenly: Once the butter is incorporated, a few more pulses with the S-blade distribute the liquid, bringing the dough together without overmixing.
What About the Plastic Dough Blade?
Some food processors come with a plastic dough blade, often designed for kneading yeast-based doughs like bread or pizza dough. While it might seem intuitive to use a “dough blade” for pie dough, it’s generally *not* the best choice for this specific task.
- Too Gentle for Butter: The plastic blade is often too blunt to effectively cut through cold, firm butter. Instead of creating distinct pieces, it might just mush the butter, leading to a less flaky crust.
- Risk of Overmixing: While gentler, it can still overmix the dough if not used carefully, and its inability to properly cut butter means you’d have to process longer, increasing the risk of overworking.
For pie dough, stick to your metal S-blade. Save the plastic dough blade for its intended purpose – lighter kneading of yeast doughs.
Other Attachments to Avoid for Pie Dough
You might have other discs like shredding, slicing, or grating blades. These are excellent for vegetables and cheese but have no place in making pie dough. They would simply shred or slice the butter and flour into an unusable mess.
Step-by-Step Guide: Making Pie Dough with the S-Blade
Ready to make some delicious pie dough? Let’s get started!
Step 1: Gather Your Ingredients and Tools
This is where preparation meets perfection.
Visual guide about What Food Processor Attachment for Pie Dough
Image source: assets.epicurious.com
H3-1: Essential Ingredients
- All-Purpose Flour: Usually 2 ½ cups.
- Salt: About 1 teaspoon.
- Unsalted Butter: 1 cup (2 sticks), *very cold and cut into ½-inch cubes*. You can even freeze the butter cubes for 10-15 minutes before using for extra coldness.
- Ice Water: 6-8 tablespoons. Have a glass of water with ice cubes ready, as you’ll only use the water, not the ice itself.
H3-2: Food Processor Setup
- Ensure your food processor bowl is clean and dry.
- Insert the metal S-blade firmly onto the spindle.
- Make sure the lid is ready to lock into place.
Step 2: Combine Dry Ingredients
This initial step helps distribute the salt evenly throughout the flour.
- Add the flour and salt to the food processor bowl.
- Pulse a few times (3-5 short pulses) to combine.
Step 3: Add the Cold Butter
This is where the magic begins. The colder the butter, the flakier your crust will be.
- Scatter the cold, cubed butter over the flour mixture in the food processor.
Step 4: Process the Butter and Flour
This is the most critical step for developing the right texture.
- Pulse the food processor in short bursts (1-2 seconds each).
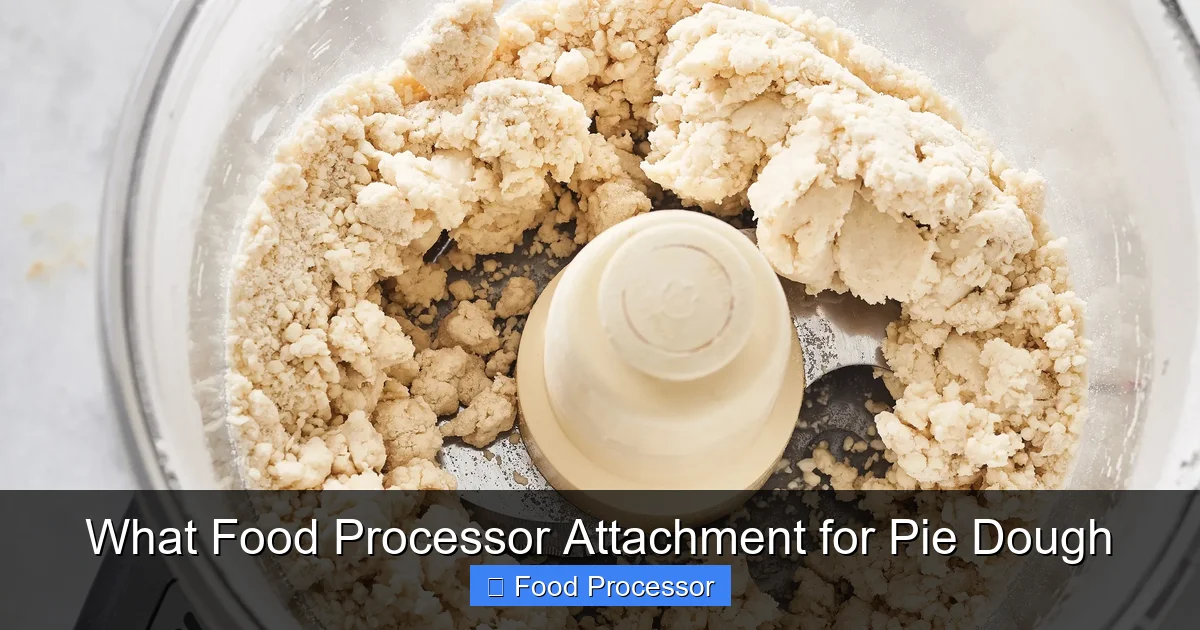
- Continue pulsing until the butter is cut into pieces that resemble coarse meal or small peas, with some larger pea-sized pieces remaining. This usually takes about 10-15 pulses, but observe the texture rather than counting. You should still see visible pieces of butter.
- Do not overprocess here! You want distinct pieces of butter, not a smooth paste.
Step 5: Gradually Add Ice Water
Water brings the dough together. Use just enough to hydrate the flour.
- With the food processor running on low or “pulse,” gradually drizzle in the ice water, one tablespoon at a time, through the feed tube.
- Pulse just until the dough *just* starts to come together and form large clumps or a shaggy ball. This usually takes about 6-8 tablespoons of water and another 10-15 pulses.
- Stop immediately once it reaches this stage. The dough might not look perfectly uniform, and that’s okay. Some dry bits are fine; they will hydrate during chilling.
Step 6: Form and Chill the Dough
Chilling is crucial for flavor, texture, and ease of handling.
- Carefully remove the dough from the food processor bowl and turn it out onto a lightly floured surface or a piece of plastic wrap.
- Gather the dough and gently press it into a disk shape. If making a double-crust pie, divide the dough in half and form two disks. Avoid kneading or overworking the dough at this stage.
- Wrap each disk tightly in plastic wrap.
- Refrigerate for at least 30 minutes, or up to 2 days. Chilling allows the gluten to relax, the butter to firm up, and the flour to fully hydrate, making the dough much easier to roll out.
Practical Tips for Perfect Pie Dough
Even with the right food processor attachment for pie dough, a few extra tips can elevate your results.
- Keep Everything Cold: This cannot be stressed enough. Cold butter, ice water, and even a chilled food processor bowl (if you have room in your freezer) will make a huge difference.
- Don’t Be Afraid of Mess: Sometimes the butter sticks to the side of the bowl. Stop, scrape it down, and continue pulsing.
- Listen to Your Dough: The sound of the food processor changes as the dough comes together. When it starts to “clump” and sound less crumbly, it’s time to stop.
- Resist the Urge to Knead: Once the dough is out of the processor, handle it as little as possible. Gentle pressing is fine, but kneading develops gluten and makes the crust tough.
- Plan Ahead: Make your pie dough a day or two in advance. It often tastes better and is easier to work with after a good long chill.
- Consider Your Food Processor Size: For a standard double-crust pie, a 10-12 cup food processor is ideal. Smaller models might require you to make the dough in batches. If you’re still in the market for a new appliance, understanding what to look for when buying a food processor can help you choose one that’s perfect for dough and other tasks.
Troubleshooting Common Pie Dough Issues
Even with the best intentions and the right food processor attachment for pie dough, sometimes things don’t go exactly as planned. Here are some common issues and how to fix them:
H3-1: Dough is Too Sticky
This usually means you’ve added too much water or overprocessed the dough, causing the butter to melt and gluten to overdevelop.
- Solution: Gently add a tablespoon or two of flour and lightly press it into the dough. Then, chill the dough thoroughly. If it’s still very sticky after chilling, roll it between two sheets of parchment paper.
H3-2: Dough is Too Dry and Crumbly
This means not enough liquid was added, or the butter wasn’t incorporated properly.
- Solution: If still in the food processor, add another tablespoon of ice water and pulse a couple more times. If you’ve already formed the disk, sprinkle a teaspoon of ice water over the crumbles, gently press, and try to form it again. Don’t add too much at once.
H3-3: Dough is Tough and Hard to Roll
A tough dough is a sign of overworking, which develops too much gluten.
- Solution: The best remedy is time. Chill the dough for at least an hour, or even longer (up to several hours). This allows the gluten to relax, making the dough more pliable. Handle it as little as possible when rolling.
H3-4: Butter Hasn’t Incorporated Well (Large Chunks Remain)
This often happens if the butter was too cold or the pulsing wasn’t quite enough.
- Solution: If you still have very large, distinct chunks after initial pulsing, continue pulsing a few more times until they are more pea-sized. If you’ve already added water, just proceed as planned; some larger pieces can actually contribute to extra flakiness, but too many can make it hard to roll.
Maintenance and Cleaning Your S-Blade and Bowl
After all that delicious pie dough making, don’t forget to clean your tools! The S-blade, while robust, has sharp edges, so always handle it with care.
- Unplug first: Always unplug your food processor before disassembling or cleaning.
- Remove the S-blade: Carefully lift the S-blade straight up and out of the bowl.
- Wash immediately: Wash the blade and bowl with warm, soapy water. Many are dishwasher-safe, but handwashing is often recommended for longevity, especially for the blades. Use a brush to get into crevices.
- Dry thoroughly: Ensure all parts are completely dry before storing to prevent rust or mildew.
Conclusion
Congratulations! You now know exactly what food processor attachment for pie dough to use – the mighty S-blade – and how to wield it to create flawless, flaky pie crusts every single time. Making pie dough in a food processor is not just about speed; it’s about consistency, ease, and ensuring your butter stays perfectly cold, leading to superior results.
This method takes away the fear and much of the mess associated with traditional pie dough making, opening up a world of baking possibilities. So, go forth and create delicious pies, tarts, and quiches with confidence. Your perfectly flaky crusts will be the talk of the town! Of course, if you find yourself without this handy appliance, there are still excellent methods for what to do without a food processor for pie crust. But for speed and consistency, the S-blade is your best friend.
